[UPDATE] After this tutorial was written, Linksys introduced a new product called the WET11, an Ethernet to Wireless Bridge adapter which is easier and less expensive to use than the method outlined below. Another advantage of using the WET11 is that it can work with other manufacturer's 802.11b Wireless Access Points. The WET11 has since been replaced by a WET54g, which provides an easy way to get the de100c on to your wireless network. There will need to be a little configuration to do from your PC such as like setting the SSID and WEP in the WET11/54g to match your network's settings. If you have the installation CD, it will walk you through the configuration. If you don't you can just plug the WET11/54g into the router and search for it at the configuration page from a browser on your PC at http://192.168.1.225 for the WET11 or http://192.168.1.226 for the WET54g. Then set the SSID and WEP key to match the settings on your network. After you've done that, you can remove it from the router and connect it to the de100c and be up and running in no time. In the event that someone has already changed the password on the device from its default setting (which is admin) and you don't know what it is, you can push in on the recessed reset switch on the WET to restore the WET to its default settings. Linksys has documentation on the website on these devices but in case you can't find it, I have pdf copies of the quick start guides for the WET11 and WET54g.
"Does the de100c support any wireless USB or PCI card adapters?" I am afraid not. USB and PCI wireless devices require drivers to be written for each OS and are custom to the device. The only supported drivers for these adapters are for Windows. Occasionally, someone will submit an 'as is' driver for Linux, but no manufacturer is willing to support them. Also, every time the adapter's hardware changes (which seems to be about every 6 months), a new driver needs to be submitted and tested. This is impractical for most situations.
Note: The tutorial below is only for historical reference, the recommended method for connecting your DEC to a wireless network is to use the Linksys WET11 mentioned above....
A common problem with implementing a home LAN is that it is sometimes very difficult to route a CAT5 cable to a remote part of an existing house. For this reason, people are asking about using wireless networking technology such as 802.11b to extend their networks to other parts of the house. This page describes the basic steps for connecting an Ethernet device such as the HP de100c Digital Entertainment Center into your home network via a wireless connection. The configuration will require a router that supports NAT and DHCP such as the Linksys BEFSR41 to operate upstream from the wireless access point. I will note in advance here that this configuration is dependent on features that are in the most recent version of Linksys WAP11 access points. It will not work if you try to use the combination BEFW11S4 combination WAP/4 port router and a single WAP11 access point. If you already own a BEFW11S4 wireless router or another manufacturer's wireless access point, you should just use the WET11 solution which is cheaper than a pair of WAP11s.
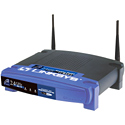
First, you'll need a pair of Linksys WAP11 wireless access points. These devices will allow you to extend your wireless network with a wireless bridge.
The WAP11 comes with a CD containing configuration software and drivers. You should first load this software on to a PC and follow the directions to get the drivers and configuration program installed. The WAP11 contains a USB port strictly for the purpose of configuration.
After loading the USB drivers on the PC you must update your WAP11s to the latest firmware. To do that, you need to download the firmware image and USB configuration utility. This software can be found at the Linksys web site. At the time of this writing, the latest version of WAP11 firmware is 1.4i1. It's important to have the latest firmware since some of the features you'll require have only been added to the WAP11 recently.
Shown above is the main status screen and default parameters of the WAP11. You may leave the Advanced Settings and IP Settings at their default values. We won't discuss encryption (under the Security tab), but it's a good idea to enable it after you've got things working to prevent unauthorized access of your wireless network. The WAP11 manual explains how to enable encryption.
The Basic settings are shown above and may be left with the default values. If you change the ESSID or channel, you will need to make a note of these changes for any other devices that you intend to use with this Access Point. The Access Point Name isn't critical for this application and can be left as is.

The Access Point is the default configuration and you should leave this configured as an Access Point on the upstream WAP so you can use other wireless devices on your network. The downstream WAP will be set to the Access Point Client mode. There is another mode called the Wireless Bridge mode which could be used to make the WAP11s function as a single channel. Up until recently, it would have been necessary to use this mode to extend your wireless LAN. However, now with the Access Point Client mode, you can leave the upstream WAP11 in Access Point mode so other wireless devices can take advantage of the wireless network.
On the downstream Access Point where you connect to the remote LAN segment, you should configure it as an Access Point Client and put the MAC address of the upstream Access Point in the field called the preferred BSS. The MAC is a 12-character address and can be found in its Status screen (shown in the field called Ethernet address) or printed on a label under the WAP11. Access Point Client mode is a recently added feature so you'll need to make sure you have firmware version 1.4i1 or newer to take advantage of it. The WAP11 will only work as an Access Point Client with other WAP11 access points. It won't work downstream from any other wireless devices, even with the Linksys BEFW11S4 wireless router.
If you have a single Ethernet device you want to bridge into your network, you'll need to use a crossover CAT5 cable between it and the remote WAP11. However, if there are other devices you would also like to network in the same location, you can use regular CAT5 cables and a hub such as the 5-port Linksys EFAH05W to get all the devices connected to the hub and then to the remote WAP11.
Return to the HP de100c FAQ