Serial Cable for HP Media Vault
The procedure below is for the MV1 (mv2010, mv2020, and mv2040). The MV2 (mv2120, mv5140, mv5150) procedure is explained toward the bottom of this page.
If you're proficient with Linux and would like to poke around inside the HP Media Vault, you can enable telnet as explained in this section of the FAQ. If you want to do some low-level experimenting, you can also connect through the serial console. But first you'll need a serial interface level shifter.
Acroname in Boulder, Colorado makes a serial interface level shifter for their robotic products that will work with the HP Media Vault provided you make one minor modification. I'd recommend that you order the S15-BS-INT-ASM kit which includes the level shifter board, a 6-foot 9-pin D-type male-to-female RS-232 extension cable, and a small 4-wire interface cable. The bundled cost is around $20, which is less expensive than ordering the parts separately. If your PC doesn't have a serial port, you can also get the USB-to-Serial board kit, S20-USB-INT-ASM which also includes a 6-foot USB cable and the 4-wire interface cable. The USB-to-Serial interface requires a special driver to be installed on the PC that must first be downloaded from Acroname's website. It's also a little more expensive, around $30.
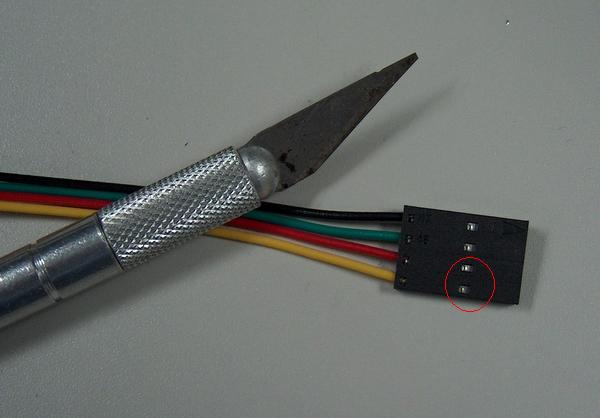
The 4-wire cable needs a modification before it can be used with the HP Media Vault. There are two ends on the 4-wire cable, a female and a male end. It's necessary to exchange the red and yellow wires only on the female end of the cable. To do this, I recommend an Exacto knife or something similar to press down on the barbs that hold the metal contacts into the plastic housing while gently tugging on the wire to get it to come out of the housing. The barbs are shown circled in red below:
After removing these wires, it may be necessary to bend the barb back up so that it will latch properly into place when reinserted back into the connector housing. When reinserting, pay attention to make sure the barb will line up with the window and put the yellow wire in position 3 and the red wire in position 4, essentially swapping them from the original configuration shown above.
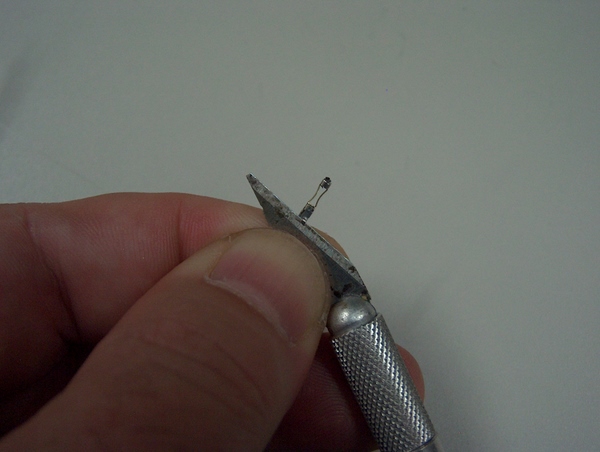
The image above shows the method of bending the barb back up in the event that it got deformed while removing the contact. Be very careful, if you bend it too far, you can break it.
To get access to the motherboard, remove the power cord from the HP Media Vault and then remove the three screws on the rear of the chassis that secure its side cover. Then slide the side cover back about an inch and lift up. After the cable modification has been made, you can insert it into jumper J8 on the HP MediaVault's motherboard like in the image shown below. J8 is at the edge of the board under the mobile rack that holds the second hard drive. You will need to temporarily need to remove the hard drive tray to see this connector. The image below is of a unit that has had the mobile rack removed for clarity. The 12-pin header, J13, just to the left of J8 shown below will be a no-load part on the production units. It's a JTAG port, in case you're curious.
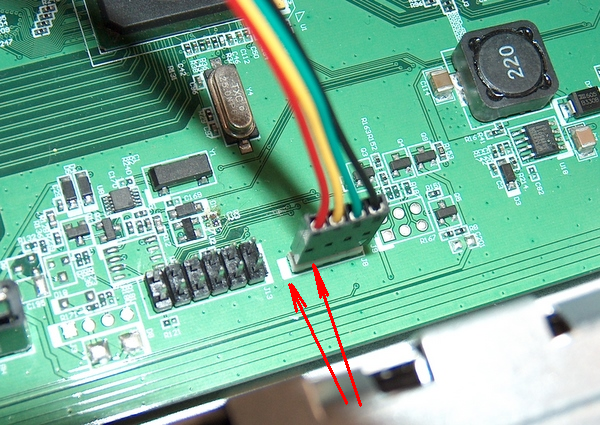
Please note that the red wire should be next to the thick white bar at the end of header J8. This is the 3.3V line. Make sure the connector is correctly installed before powering the unit back on. Be very careful not to switch this around because you could damage your media vault or level shifter if you install it backwards. The pinout of J8 in this photo is from left to right is: 3.3V, TX, RX, GND.
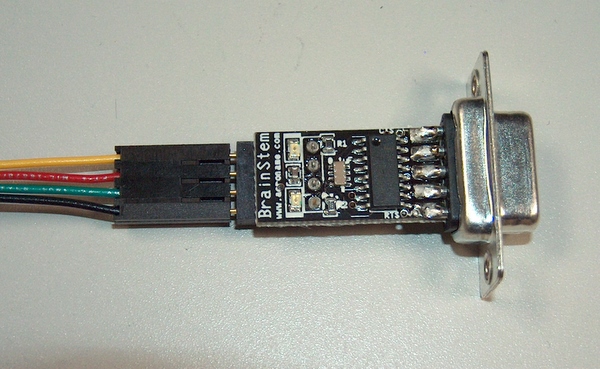
The male end of the 4-pin cable plugs into the BrainStem serial interface. Again, please note the arrangement of the board and connector and wires. After you're done assembling the cable to the board, you may wish to use heatsrink tubing (~.5" dia) to cover the board to insulate it to prevent it from shorting to any conductive surfaces. If you don't have heatshrink, you can use electrical tape.
Then set up your terminal program with the following settings:
115,000 baud, 1 stop bit, no parity, no flow control
You can use Hyperterm found under Accessories-> Communication on the PC or any suitable terminal program. The main difference between using this console and telnet is that you will see startup status through this port as well as periodic status messages. They can be a little distracting when you're typing Linux commands, so it's best to ignore them. If you type <ctrl> C during power up, you can get into the CFE (common firmware environment) before Linux boots. The CFE is a form of boot loader with a very rudimentary command set.
MV2 Serial Console:
For the HP MV2, this is the pinout of the serial console connector (CN4):
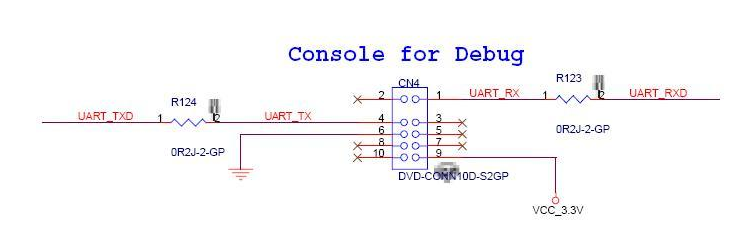
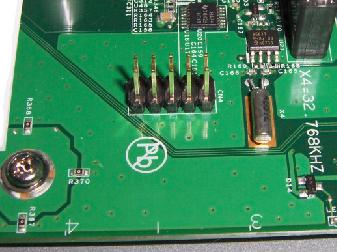
Below is a picture of CN4 which is positioned behind the grille on the MV2. The grill can be removed by first removing the 4 phillips-head screws holding it in place. You should also remove the drive tray so that the grille can be pulled away.
Pin 1 is the pin farthest to the left and toward the back of the product (as viewed from the front). Pin 9 is on the far right toward the back. The even pins 2-10 are on the front of the connector from left to right.
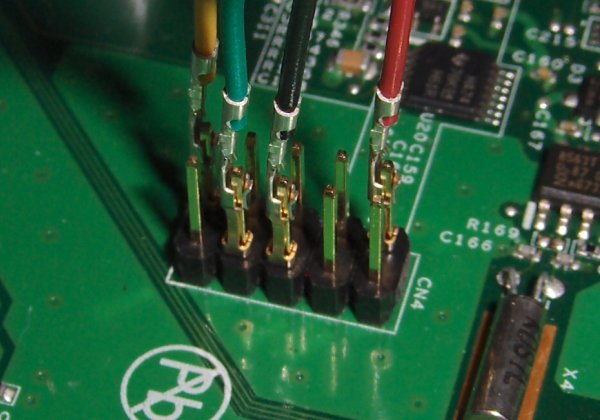
If you wish to use the Brainstem, then you can remove the wires from the single row connector housing as explained above and place them in a two-row connector housing (.100" spacing) as follows:
Pin 6 - black (Gnd)
Pin 1 - yellow (TX)
Pin 4 - green (RX)
Pin 9 - red (3.3V)
Bryan S. has provided a close-up of hooking a Brainstem on the MV2 board after removing the wires from its original connector:
The Hyperterm properties are the same as for the MV1:
115,000 baud, 1 stop bit, no parity, no flow control