Adding an Internal Hard Drive
The HP Media Vault’s primary system hard disk uses the Serial ATA (SATA) interface. The internal expansion bay accommodates a second SATA disk. (The server does not support adding Integrated Drive Electronics (IDE) disks.)
| Note | |
|
You should not remove or add a hard disk to the server while it is powered on and running. |
| To add a hard drive to an expansion bay |
- Press the power button on the back of the Media Vault for about five seconds and release it to turn off the server.
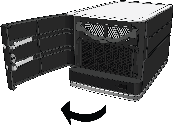
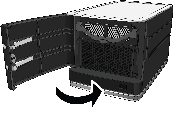
- Open the door on the front of the Media Vault.
- Press the lever to unlock the handle.
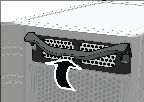
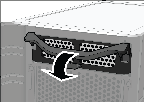
- Lift the handle all the way up.
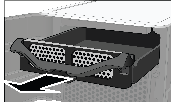
- Gently pull the hard-drive tray from the expansion bay.
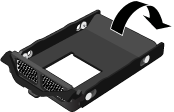
- Fold down the flap near the back of the hard-drive tray.
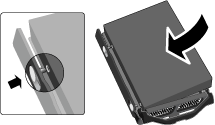
- Insert the new drive into the left side of the hard-drive tray, making sure that the pins go into the hard drive’s mounting holes.
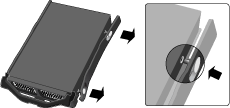
- Flex the right side-rail, and then insert the pins into the hard drive’s mounting holes.
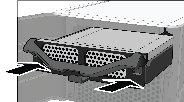
- With the handle up, slide the hard-drive tray and drive into the expansion bay.
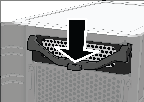
- Press down on the handle on the hard-drive tray until it locks.
- Close the door on the front of the server.
- Press the power button on the back of the Media Vault to turn it on.
- Notice that within a few seconds the light-bar for the
new hard drive turns purple
 .
.
- This indicates that the hard drive has been installed, but has not been initialized.
| Note | |
|
This flap improves air flow through the server. If you remove a drive, be sure to fold this flap back up. |
| To add a hard drive to total storage |
- At the computer, click Start, All Programs, HP Media Vault, and then Control Center.
- On the Tools tab, click Customize HP Media Vault.
- You are prompted for an administrator name and password if you set one up. For additional information, see Editing System Settings.
- On the Disks tab, locate the internal disk you want to add.
- Click Add.
- Select an option for allocating the disk space.
- Allocate disk to make current storage mirrored (protects current storage, RAID 1) - adds the internal drive as mirrored storage space.
- The type of mirroring supported on the Media Vault is called Redundant Array of Independent Disks (RAID) RAID-1.
- In RAID-1 mirroring, an identical copy of data written to one hard disk is written to a second hard disk. Mirroring disks reduces your total hard disk storage capacity by half. The advantage is that if one hard disk fails, you have a copy of your data on the second hard disk.
- Allocate disk to expand current storage (increases current storage) - combines the available space from the system drive and the internal hard drive to make one large logical disk. The drive space is not mirrored. If a non-mirrored drive fails, the files stored on the failed drive are lost. If a drive is removed from the HP Media Vault, the system is not operational until the drive is replaced.
- Click Accept.
| Caution | |
|
It is important to select the storage space allocation option with care. Changing how the storage space is allocated later may require you to transfer all of the files to a separate device and reformat the drives. |
| » Back to top | < Back | Next > |
