In the past few months I’ve run into a number of people who have experienced problems with their laptops running hot. I had an HP/Compaq nx6110 laptop sitting in a drawer that I recalled had been exhibiting the same issue. I wanted to loan it to my nephew to use during a visit and I thought I’d take the opportunity to put in a new battery and check to see the if I could find the root cause of the overheating issue.
I had checked a number of sites on the web that talked about overheating issues with laptops, but none of them talked about the potential for the fan/heatsink assembly to collect dust and block the airflow through the heatsink. If you think about it, most laptops operate like a vacuum cleaner in that they suck air up through a hole in the bottom of the case and blow it out the side. The air must flow through a radiator with fins that can collect lint, dust, pet hair and anything else that it might find in ample quantities when the laptop is placed on a carpet, blanket, or your lap. So the odds are pretty good that if you’ve had your laptop for any length of time, dust has accumulated inside and has negatively affected the heatsink’s ability to remove heat from the CPU.
In preparation for removing the fan from the laptop, I downloaded a PDF of HP nx6110 service manual from the HP website. You can do a Google search for your laptop’s model and the words, ‘service manual’ to see if the manufacturer makes the service manual available online. You may notice that removing the fan seems to require all kinds of parts to be taken off the laptop since they seem to cover everything else first, but in my case, it only involved removing the keyboard, which turned out to be quite easy.
The steps were:
1. Remove battery and the cover for the memory (1 Phillips screw).
2. Remove 2 T8 Torx screws exposed after the memory cover is removed. These screws hold in the keyboard.
3. Slide four latches on the keyboard downward to release the keyboard.
4. Remove the fan (2 Phillips screws).
Although I removed the fan and keyboard cables, I found out later that I really didn’t need to do this to get at the heatsink, you can simply lay them over as long as you’re careful not to move them and put strain on the cables.
I’ve attached some images of the fan and heatsink below. Click on any image for a higher resolution version of it.
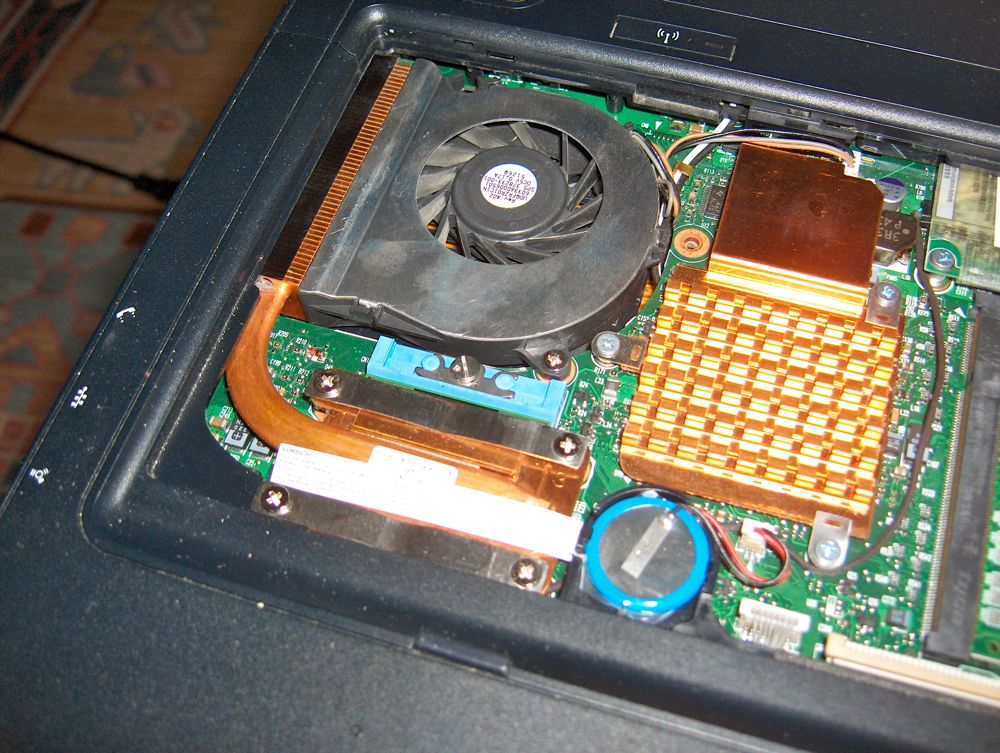
As you can see from the picture above, the fan is exposed once the keyboard is removed. It doesn’t appear to be too dirty, but the dust is hidden between the fan and the heatsink.
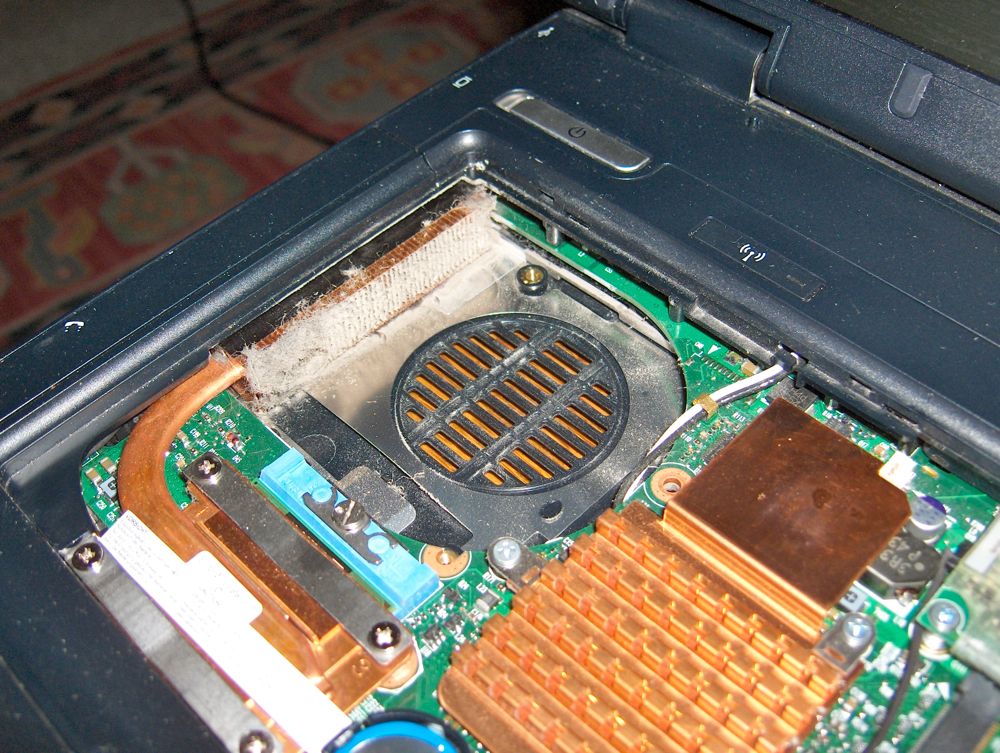
Now that the fan has been removed, you can see that there is a lot of dust that has accumulated on the heatsink. You can use a brush to remove the dust and then blow it out with compressed air.
The dust that had accumulated on the heatsink caused the air to be blocked and so the air that does get through is very hot since a smaller portion of the heatsink is being used to remove the heat. It can also increase the velocity of the air because it’s forced through a smaller restriction. Eventually, however, if it’s not cleaned, the heatsink will no longer be able to do its job at all and the computer could shut down due to overheating.
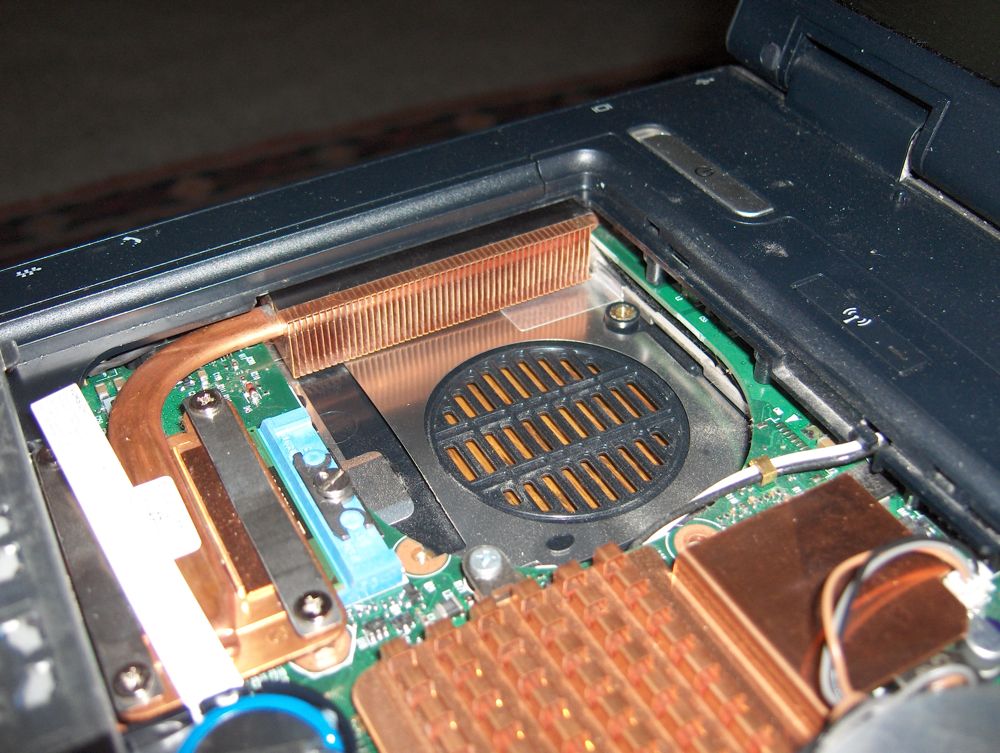
Once the heatsink was cleaned, the air that exited the vent was much cooler, and the fan didn’t need to work as hard to keep the CPU cool (around 45 °C). In doing some research, I found that the BIOS was using various CPU temperature thresholds to determine when to turn the fan on and when to increase its speed. In my case, the BIOS was original and it was turning the fan on at 40 °C, and so I decided to see if any improvements were possible by updating the BIOS. Sure enough, a newer BIOS available from HP’s website had raised this limit to 45 °C which turned out to be much better, since that is the temperature where the CPU tends to stabilize when it’s at idle and so the fan stays off unless you’re doing something that causes the CPU to become busy.
I have a friend with an HP laptop dv6 model and it had an overheating problem that was so severe that it would reach 90 °C and shut itself down whenever she used it for more than 15 minutes. After searching through forums for many weeks she finally came across a thread that suggested updating the video driver and the BIOS to fix an overheating issue. That turned out to be the fix in her case. Now her computer runs very cool. So make sure you’re running all the latest updates from the manufacturer.
If you clean your heatsink and your overheating problems persist, you may want to check and see if there are any processes that are keeping the CPU busy all the time. Any time the CPU utilization goes up, the fan will come on at a higher speed. You can use Windows built-in Task Manager to do monitor CPU utilization by pressing CTL-ALT-DEL keys simultaneously. A better solution than Task Manager for examining CPU utilization is the Process Explorer which is free for downloading from Microsoft. I also downloaded a free utility to monitor the CPU temperature called Core Temp. I found that I had multiple virus scanners running (you only need one of these) and some other processes I didn’t need, so I removed the software responsible for running these processes.
I found that although Core Temp was helpful, it sometimes interfered with the BIOS in reading the temperature of the CPU. A better program for measuring CPU temperature on this model of laptop was Speedfan.

If taking your computer apart sounds frightening to you, or if you have a laptop where absolutely everything must be removed to get to the heatsink, then another option is to use a can of compressed air that you can buy at any office store and blow air backward through the fan’s vent. Feel for which direction the fan blows and determine where it’s exhausting the warm air. Then shut down the computer and aim the straw into the exhaust vents and if you see dust coming out through the intake vents, then you’re making progress. When dust collects on the heatsink, it continues to attract more dust like a log jam in a river. Blowing the air backward through the vent can clear this log jam.


