I’ve owned an Etymotics ER6i in-ear headset for several years now and have been very satisfied with it. I use it for motorcycling, bicycling, mowing the lawn, and any other activity where ambient noise would otherwise drown out the audio from a standard set of earbuds.
Recently the left earphone began cutting out. By wiggling the wires near the plug I determined that the problem was near or inside the plug. I briefly contemplated purchasing a replacement headset, but then I recalled how much they cost, and it was close to $100.
There were a few resources on the web that showed how to fix a bad connection inside the etymotics earbuds, but I found nothing about how to replace the plug, so I decided to write up my experience here.
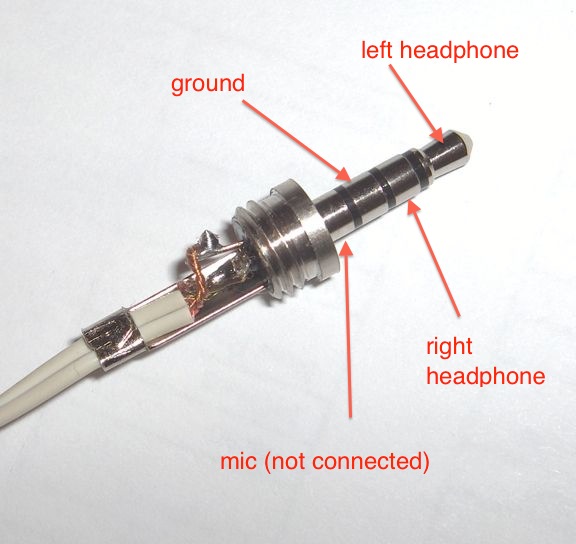
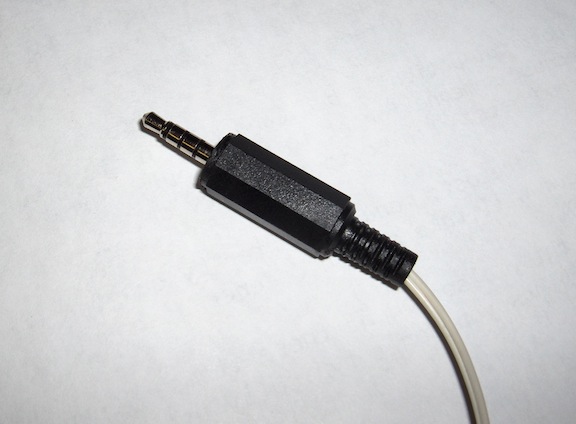
I already had a solder-on 3.5 mm plug in my parts bin and, although it was a 4-conductor plug, I figured it would work fine with my iPhone, since it uses a 4-conductor jack to mate with the Apple headsets with integral microphone. I just wouldn’t need to solder anything to the microphone ring. If I didn’t already have a plug, I would have used a 3-conductor stereo 1/8″ (3.5 mm) plug, which is available at RadioShack for a few dollars.
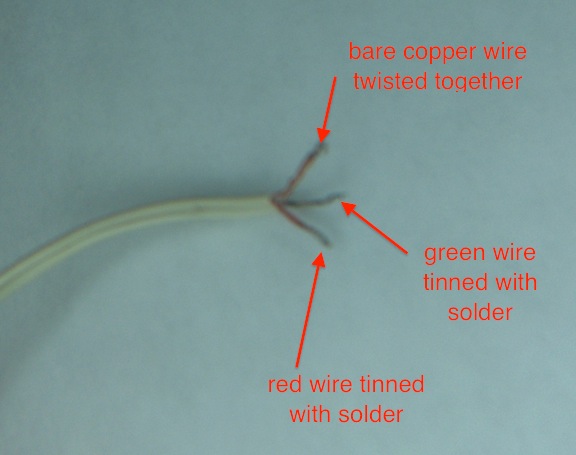
The ER6i cords are independent, but I didn’t know what to expect when I cut them off and stripped them. If I had to deal with coaxial braid, that was going to be a pain, but upon cutting the plug off and stripping the wires, I was pleased to find that each cord contained a pair of conductors, both made with fine stranded wire. Each cord had one wire that was color coded along with a bare copper wire carrying the ground. Upon some testing, I found that the red and green wire carried the right and left channels, respectively.
The green and red stranded wires are coated with an insulating material much like magnet wire that’s so thin you can see through it so even though the colored wires looked metallic and like they would be conductive, they were not. You need to tin the colored wire with a small solder blob to simultaneously burn off the insulating material and make a point where you can solder to. I was worried that the red/green wires would touch each other or the ground wire and short, but they won’t short as long as you don’t tin too much of the insulating material.
This is what the wires looked like before I soldered them into the plug. The bare copper wires from each cord are twisted together and will be soldered to the ground lug.
You need to use an ohmmeter to confirm which solder tabs are connected to the rings and tip of the plug prior to connecting each wire with a small amount of solder. I found it best to put a small amount of solder on the wires and on the solder tabs on the plug first and then just bring the wire and lug together and touch it with a very sharp-tipped soldering iron.
It was great to have a working set of earbuds again and if it ever breaks, I won’t hesitate to repair it again.


