

I came to the realization that I’ve never worn out a Norelco or Remington razor yet I’ve owned a number of them over the years. But I have worn out a number of shaver batteries. My first Norelco razor was a plug-in only model. I was lured into buying a battery-powered model that would let me shave without being tethered to the wall outlet. Over the course of a year or so, I noticed that the charge on the battery wasn’t lasting very long and so this eventually became no different than the model that had to be connected to the AC outlet all the time. I bought a replacement when I was planning a camping trip and would not have dependable access to an AC outlet. Over the course of a few years, this model did the same thing, i.e., its batteries wore out and it also had to be plugged in all the time.
At the time, I priced a service that would replace the batteries and figured out, like many others, I’m sure, that it wasn’t much more expensive to buy a new razor than to repair an old one. So I opted to get a Remington R9190 model that I could clean by running it under the water tap. What would they think of next? It had amazing capacity, providing 60 minutes of shaving on a single charge. However, after about 18 months, it too, needed to be left plugged in all the time.
I figured that these razors only needed new batteries, but knew that it would require getting the right kind of batteries, and then having to do some unsoldering and re-soldering. I found a website that sold shaver batteries and would provide the correct ones for the razors based on their model numbers. In this case, the razor model numbers I wanted to fix were a Norelco 6843XL and a Remington R9190. I found the battery packs at Electricshaver.com. In the case of the 6843XL, I received a single AA 600 mah NiCad battery with solder tabs at a cost of $9.95. The R9190 battery pack contained a pair of AA NiCads with solder tabs that were joined together at one end. I had to cut these apart to actually install them so it probably would have been better if they just provided two AA solder tab batteries. That battery pack cost $14.95. I realized afterwards that I could probably just have just ordered 3 regular solder tab AA NiCad batteries from any of a number of Internet sources for around $3.00 each and saved about $15. Live and learn.
The Norelco 6843XL came apart quite easily. I just removed two screws (although I did need to use a torx driver) and then popped its snap joints apart. The battery tabs of the single AA battery were soldered through the PC board, but with a solder sucker and some solder wick, they were easily removed and the battery was replaced.
 The Norelco 6843XL was easy to take apart. It contained a single AA solder-tab battery.
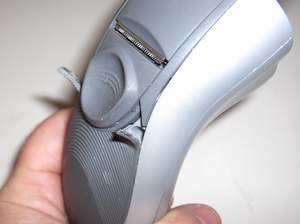
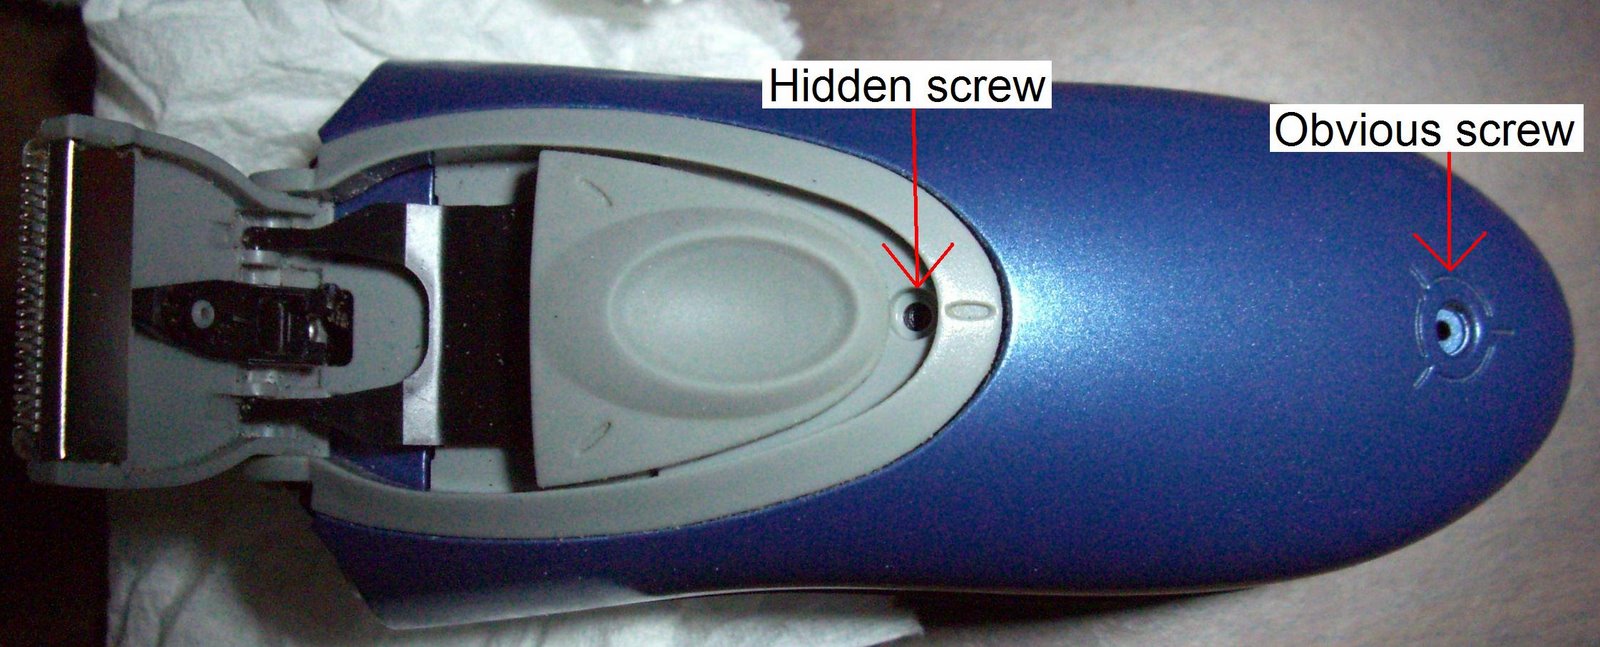
The R9190 wasn’t as easy to disassemble. There were 4 exposed phillips head screws which I removed, but the casing still would not come apart. After a lot of time fiddling, I found that there were two more hidden screws under the rubber backing and once these were removed, everything came apart. It was first necessary to pry up the corners of the rubber backing which was glued down on the back of the shaver (as shown in the photo) to expose the hidden screws. I came close to giving up on it. It’s the reason you may have found this posting, because searching for ‘Remington R9100 R9190 R9200 shaver battery replacement’ came up with nothing on the Internet. So I figure that within a few weeks of posting this, it will start to get hits because if I’m having this problem, chances are pretty good that others are as well.
The main reason I’m posting this is because I know how much I appreciate it when I find some obscure piece of information on the Internet that allows me to fix something that I’d otherwise have to throw away. I’m disappointed that Norelco and Remington continue to build products whose batteries cannot be easily serviced. I’ve read recently that many cellphones get replaced when their batteries goes bad after around 18 months of use. I find that to be extremely wasteful, and in the case of most cellphones, completely unnecessary because the batteries are generally easily replaced (unless you have an iPhone) . Of course, the battery packs sometimes have excessive markups on them when purchased from the manufacturer so that probably contributes to it as well.
I think that building batteries into a product in such a way that they cannot be replaced by an end user is unacceptable. Rechargeable batteries are only good for around 500 charge cycles and then they must be replaced. I wouldn’t want to be associated with a product where the batteries are so difficult to replace that the battery life determines the useful life of the product.
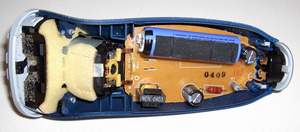
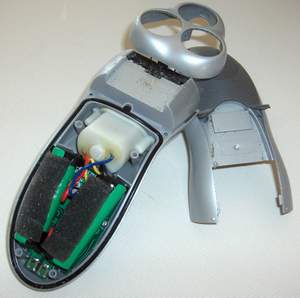 The R9190 has two AA NiCad batteries soldered together with some wiring. They are relatively easy to replace once you figure out how to get the case apart.
Both shavers are working great now and I can again enjoy the experience of untethered shaving.
UPDATE 2009-01-25
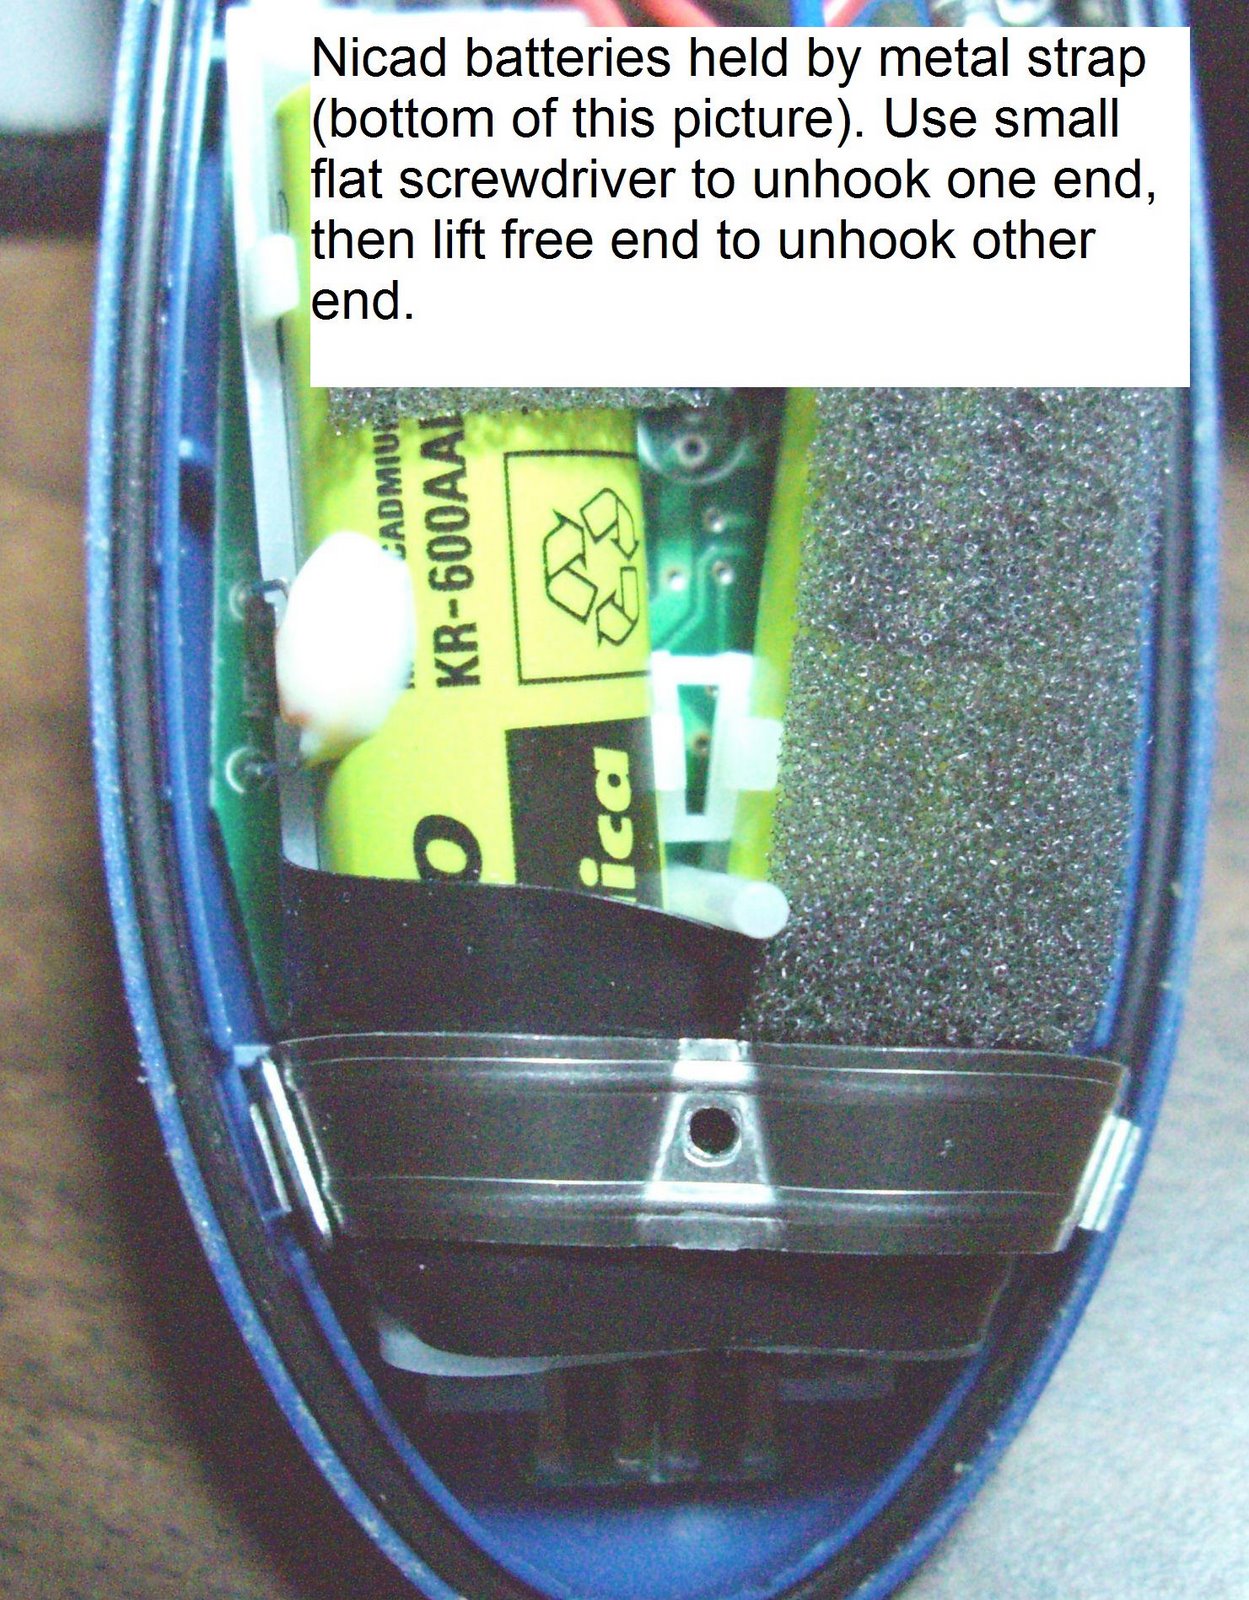
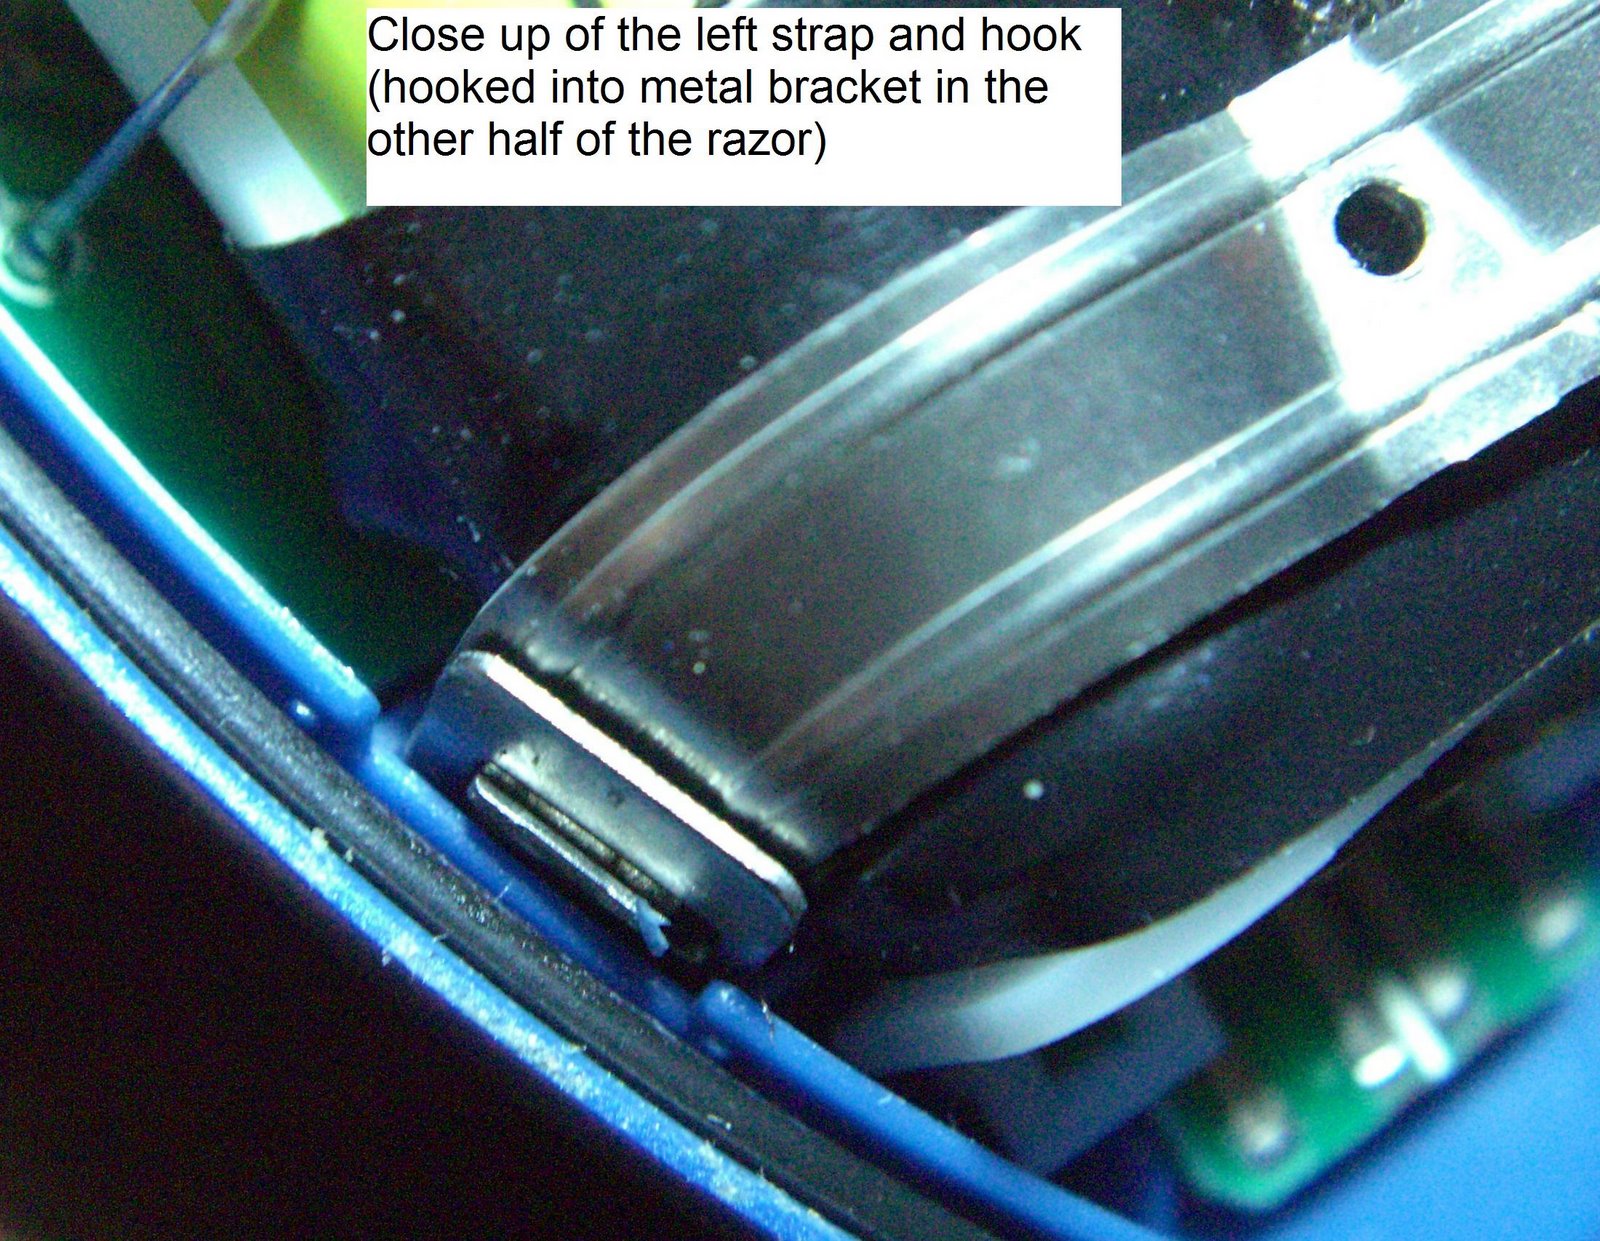
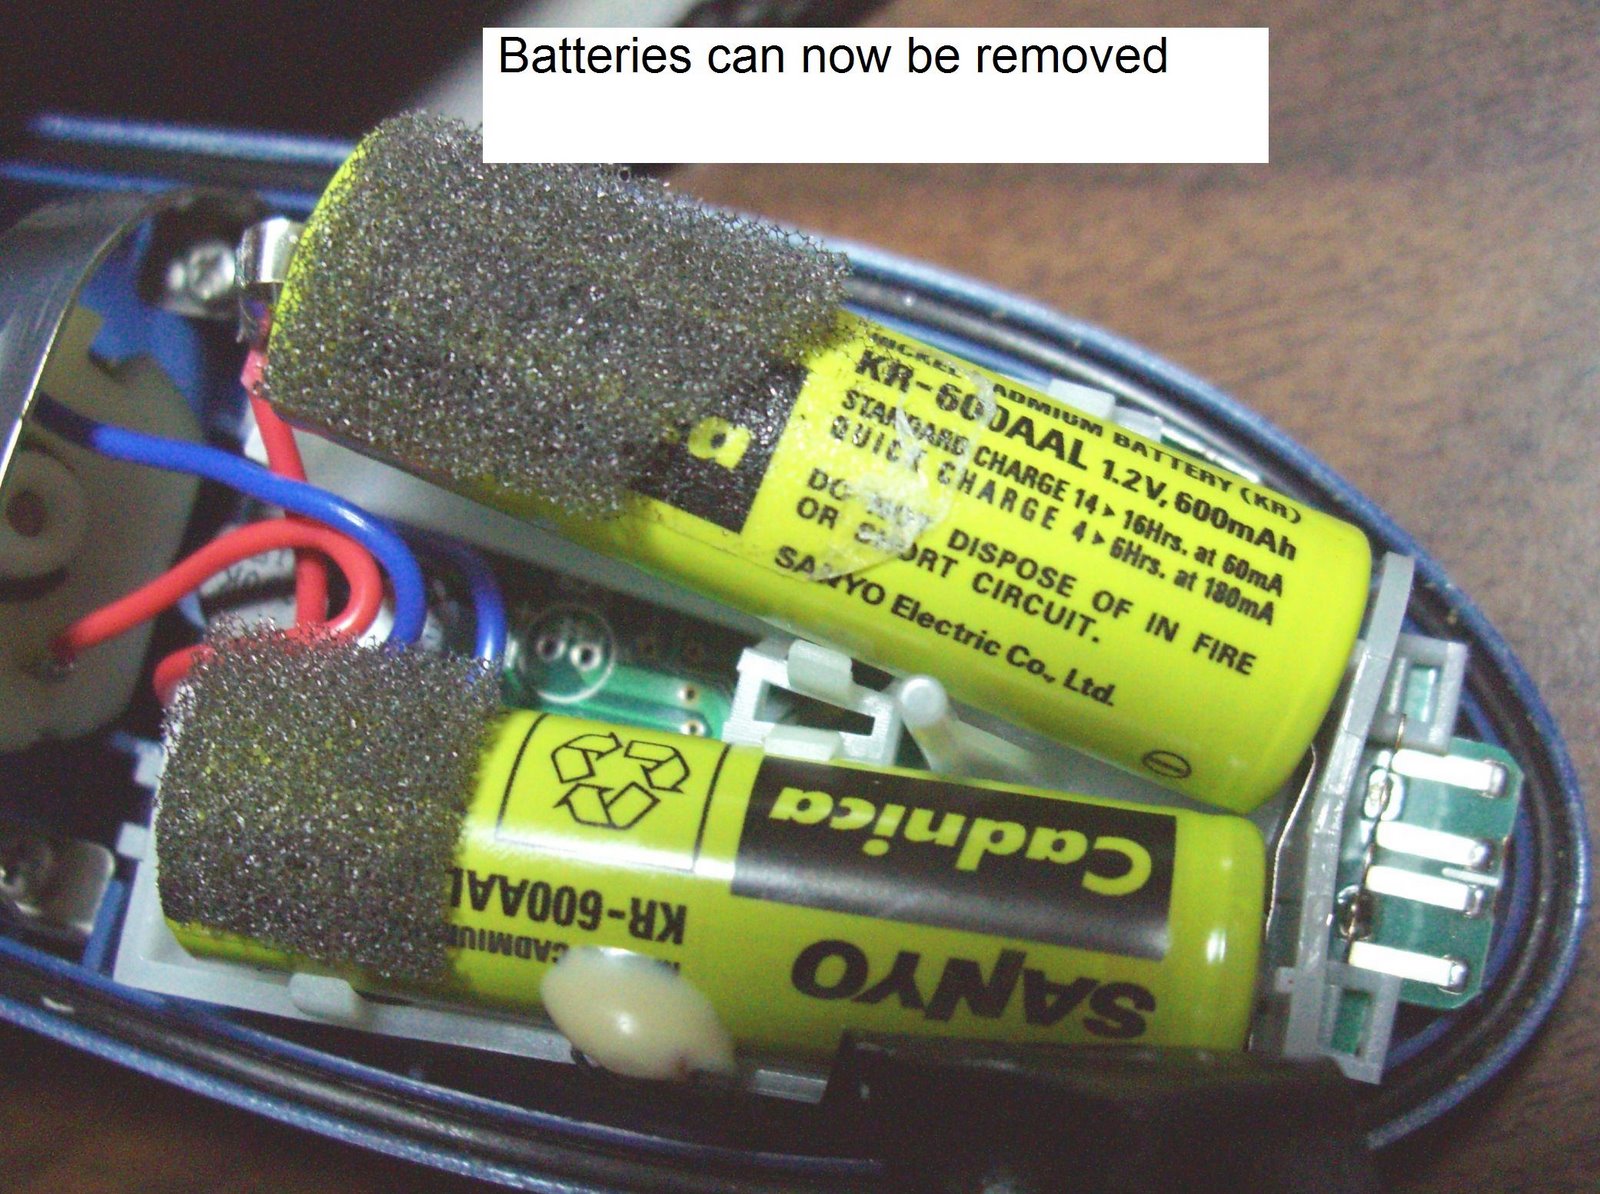
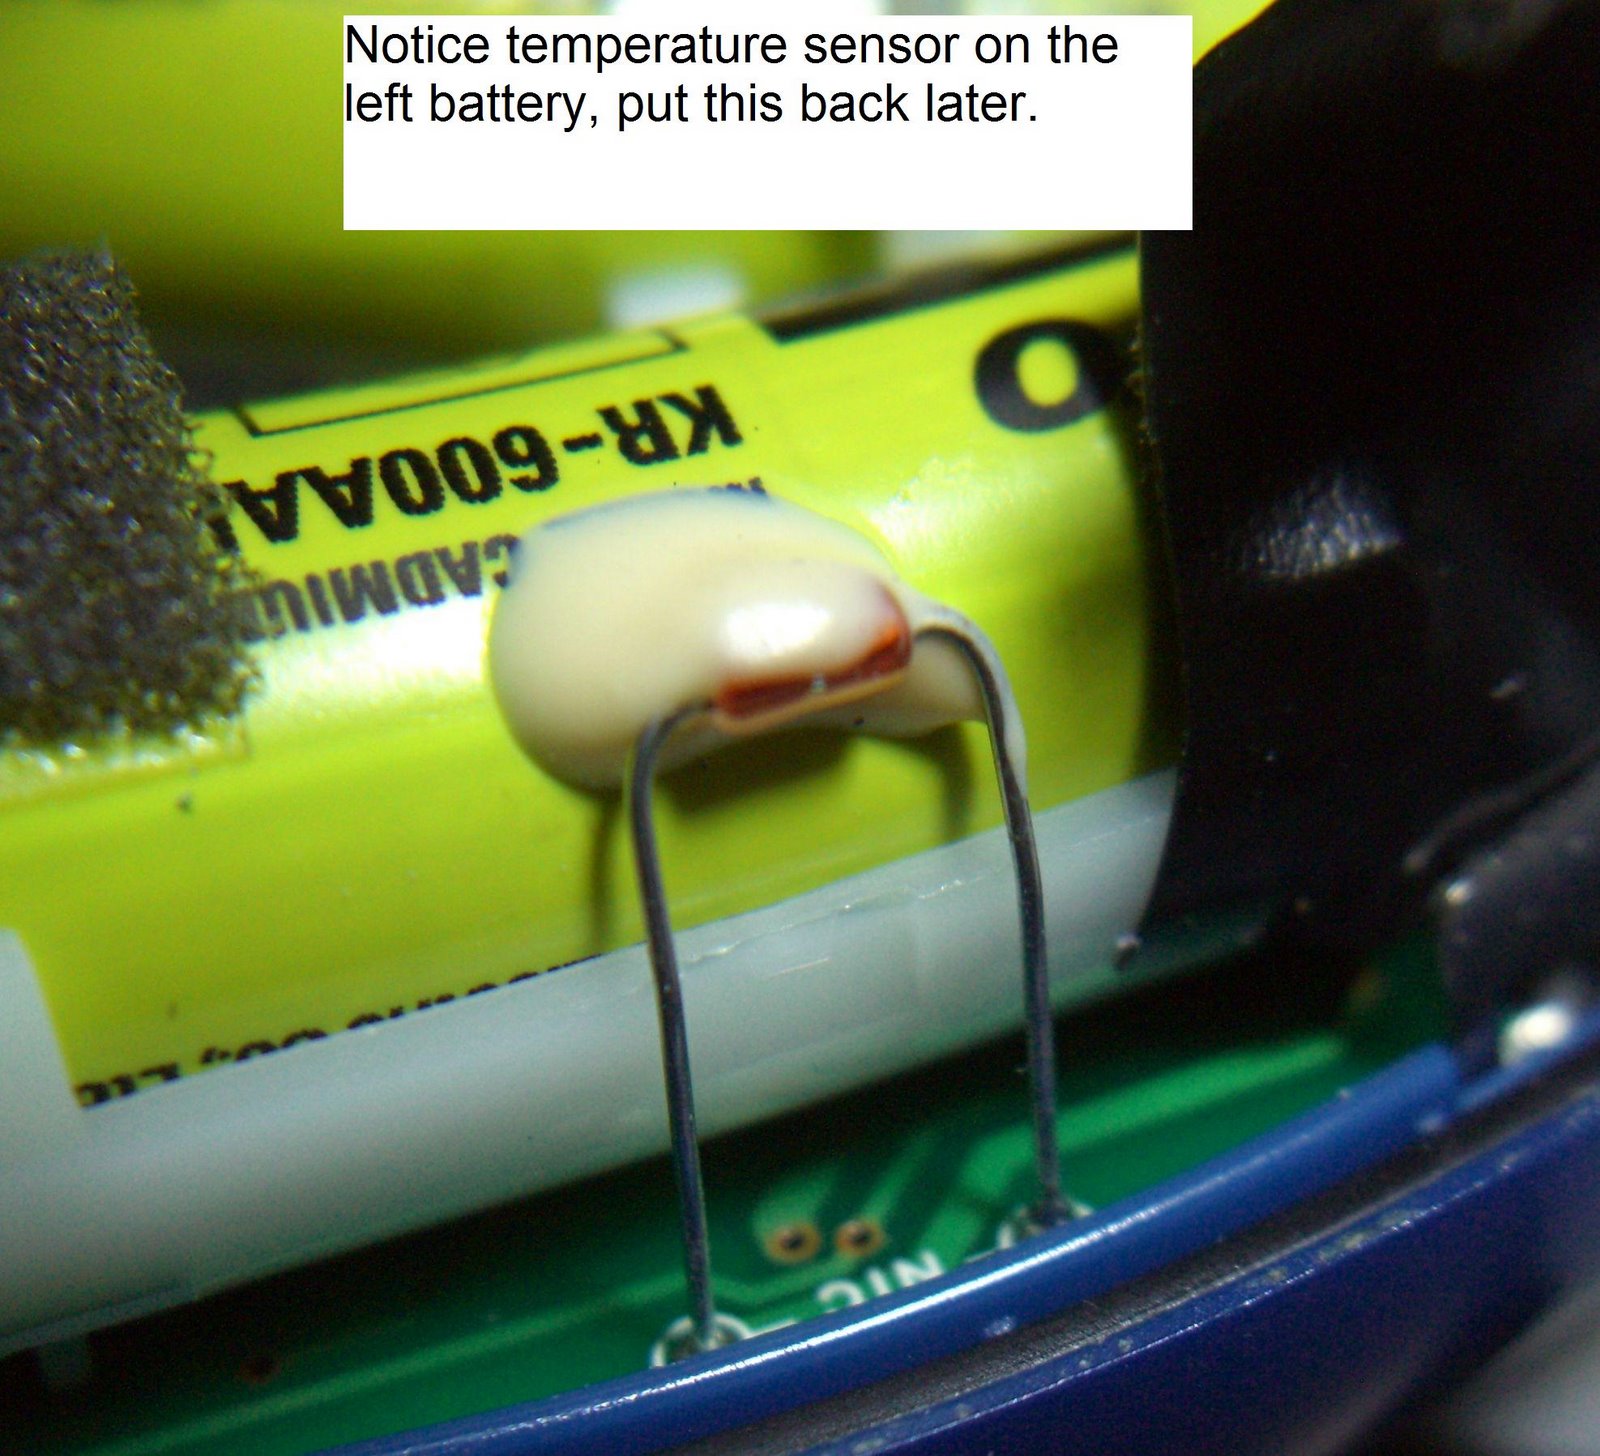
I continue to get a lot of hits on this web page so I can only imagine that many people have encountered the same problem, i.e., a razor that is still working, but with batteries that have gone flat. A very nice gentleman sent me the images below complete with annotations to show how he repaired his Remington Model 8100 razor. He replaced the solder tail AA batteries with holders for AAA batteries. Even though AAA batteries are much smaller, and usually have half the capacity of AA batteries, he found some that had nearly equal capacity to the AA batteries he replaced. The best part of his repair is that the next time they go flat, it will be very easy to replace them because it will require no soldering.
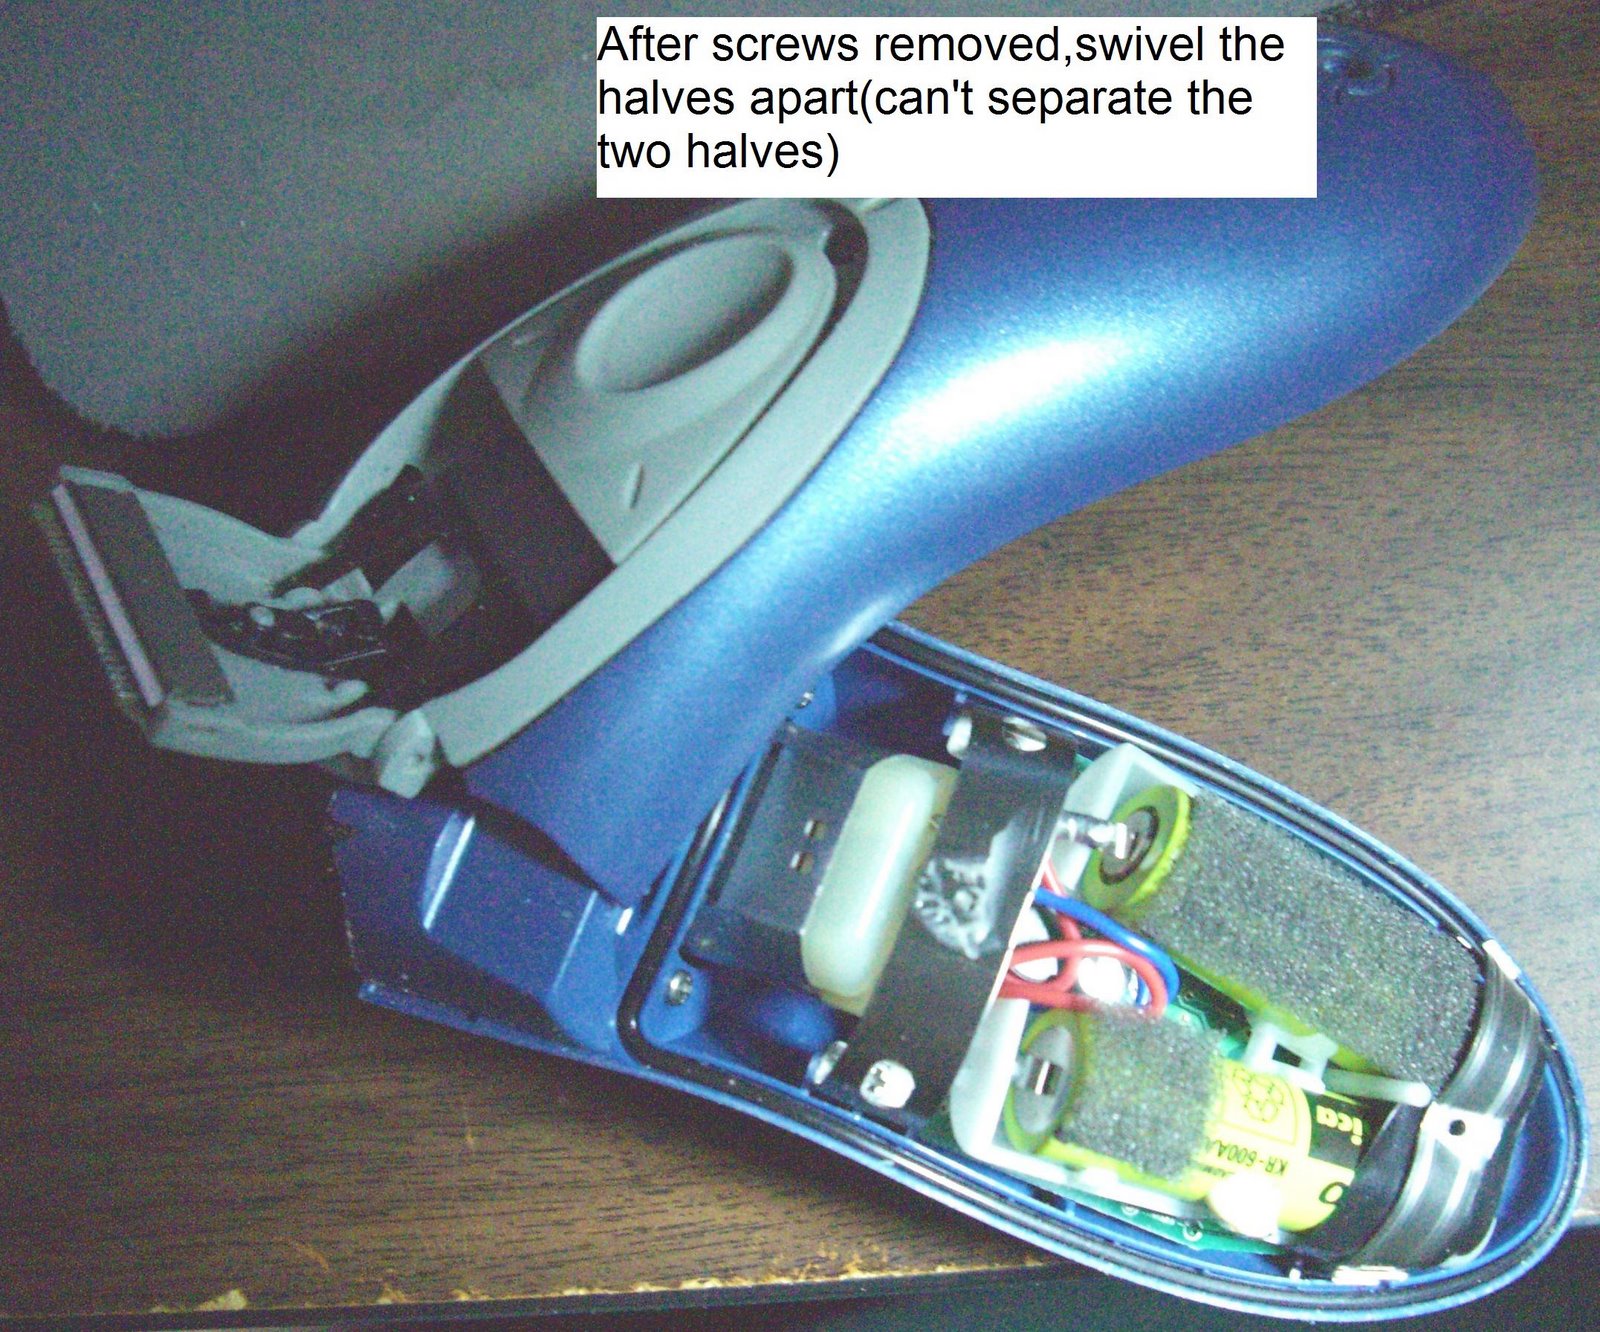


UPDATE 2012-02-26: I continue to have readers send me tips and photos on razors that are a bit different than the ones shown above. In this case John H. was kind enough to put together an 8-step sequence on how to get to the batteries on the Remington M280 M290 style razors:


I came across your site when considering what to do about my Norelco 7180XL razor, which no longer held a charge. It was a surprise to find the battery soldered in place; I had expected it to be a mechanical connector, like a phone. I fully agree with you that it’s unacceptable to make it so difficult to replace a part which has a limited life and can be expected to wear out before the appliance as a whole.
I also appreciated your information, which was instrumental in my decision to go ahead and try the procedure myself on my 7180XL. The device is different in detail, but the process in similar in general terms, and so in the spirit of sharing the knowledge, here was my experience.
I ordered the battery part (#13810584) from electricshaverstore.com. I found they were reasonably priced (including shipping, which is so often a rip-off when shopping online) and prompt to fulfil.
My razor may have been a little different to open than yours. For this model, it’s fairly easy to dismantle, but you do need a Torx screwdriver. To open the outer case, remove 2 screws at the back, and two under the flip lid with the razor heads. Remove the top, back and side panels, but the front panel remains attached after this. Then gently slide a small flat-blade screwdriver underneath the 4 clear plastic tabs that attach the front panel, raising them up above the retaining edge. You may have to wiggle one side up and keep it there while you work on another tab. When it is free, you have the internal, water tight core of the device left. Remove the remaining screws and lift up the lid, exposing the guts. Gently pull back the motor at one end and the power connector at the other for access to the circuit board.
This is probably a good time to check the form factor of the replacement battery and its polarity in its mount (+ upwards in my case). The battery is mounted in a black cradle, but this doesn’t retain it; it is kept in place simply by the two tabs that go through the circuit board, are bent back flush with the board and are soldered in place on the reverse.
To remove the old battery, you have to:
a) remove all excess solder from the battery solder pads, using an appropriate soldering iron, desoldering braid and care.
b) using a jeweller’s screwdriver or similar, and continuing to melt remaining solder, raise the bent-back tabs up perpendicular to the board (they project about 2mm)
c) pull each end through the hole, while applying more heat to melt any obstructing solder.
Yay! It’s out. Reinsertion should be easier:
a) Clean any remaining solder from the holes.
b) place the battery, paying attention to polarity, pushing the tabs through the holes
c) (bend back the tabs as they were before — I didn’t bother; I figured friction and a little solder would keep it in place and make it easier to remove next time)
d) solder in place
At this point, I tested operation (Yes!) before I put it all back together again. Be careful with the Torx screws and don’t overtighten.
Good luck!
Yeah, I’ve got a Remington M2822 cordless shaver whose two AA Ni-Cad batteries died, too. I was able to just pull out the rubber grip segment, and then just snap off the case (though a couple of spring clamps went flying, but that I was miraculously able to recover by sheer luck). I tried to unsolder the battieres, but I couldn’t do it for some reason, and I didn’t want to get the battieres too hot and explode, either. So, I took my Dremel to the contacts and broke ’em that way. I still have to run to Radio Shack to buy a pair of AA Ni-Cads. Hopefully, I’ll be able to solder some contacts onto them, and then make the final connections inside the shaver. Can anyone comment on soldering or de-soldering battery contacts – what’s the risk of exploding them?
Soldering components on to large metal objects is very difficult. That’s why you probably should try to find some NiCads with solder tails on them. The solder tails are spot welded on to the end caps. Spot welding uses high current to focus energy to just the parts being joined get the metals to fuse to each other. You really can’t do it without specialized equipment. With soldering, you need to get both parts up to the melting temperature of the solder. This doesn’t work so well when one of the parts has a high thermal mass that tries to pull the heat away from the area you’re trying to solder.
The battery’s case will try to draw heat away as you apply it and so you’ll find the whole battery getting hot. You don’t want to take that thing up to 700 F, which is the melting temperature of solder.
In one instance, someone who responded to this posting put in a AAA battery holder in place of the AA battery. Although an AAA NiMH battery only has about half the capacity of the AA, it makes things a lot easier in a few years when you need to replace the batteries again.