I came to the realization that I’ve never worn out a Norelco or Remington razor yet I’ve owned a number of them over the years. But I have worn out a number of shaver batteries. My first Norelco razor was a plug-in only model. I was lured into buying a battery-powered model that would let me shave without being tethered to the wall outlet. Over the course of a year or so, I noticed that the charge on the battery wasn’t lasting very long and so this eventually became no different than the model that had to be connected to the AC outlet all the time. I bought a replacement when I was planning a camping trip and would not have dependable access to an AC outlet. Over the course of a few years, this model did the same thing, i.e., its batteries wore out and it also had to be plugged in all the time.
At the time, I priced a service that would replace the batteries and figured out, like many others, I’m sure, that it wasn’t much more expensive to buy a new razor than to repair an old one. So I opted to get a Remington R9190 model that I could clean by running it under the water tap. What would they think of next? It had amazing capacity, providing 60 minutes of shaving on a single charge. However, after about 18 months, it too, needed to be left plugged in all the time.
I figured that these razors only needed new batteries, but knew that it would require getting the right kind of batteries, and then having to do some unsoldering and re-soldering. I found a website that sold shaver batteries and would provide the correct ones for the razors based on their model numbers. In this case, the razor model numbers I wanted to fix were a Norelco 6843XL and a Remington R9190. I found the battery packs at Electricshaver.com. In the case of the 6843XL, I received a single AA 600 mah NiCad battery with solder tabs at a cost of $9.95. The R9190 battery pack contained a pair of AA NiCads with solder tabs that were joined together at one end. I had to cut these apart to actually install them so it probably would have been better if they just provided two AA solder tab batteries. That battery pack cost $14.95. I realized afterwards that I could probably just have just ordered 3 regular solder tab AA NiCad batteries from any of a number of Internet sources for around $3.00 each and saved about $15. Live and learn.
The Norelco 6843XL came apart quite easily. I just removed two screws (although I did need to use a torx driver) and then popped its snap joints apart. The battery tabs of the single AA battery were soldered through the PC board, but with a solder sucker and some solder wick, they were easily removed and the battery was replaced.
The R9190 wasn’t as easy to disassemble. There were 4 exposed phillips head screws which I removed, but the casing still would not come apart. After a lot of time fiddling, I found that there were two more hidden screws under the rubber backing and once these were removed, everything came apart. It was first necessary to pry up the corners of the rubber backing which was glued down on the back of the shaver (as shown in the photo) to expose the hidden screws. I came close to giving up on it. It’s the reason you may have found this posting, because searching for ‘Remington R9100 R9190 R9200 shaver battery replacement’ came up with nothing on the Internet. So I figure that within a few weeks of posting this, it will start to get hits because if I’m having this problem, chances are pretty good that others are as well.
The main reason I’m posting this is because I know how much I appreciate it when I find some obscure piece of information on the Internet that allows me to fix something that I’d otherwise have to throw away. I’m disappointed that Norelco and Remington continue to build products whose batteries cannot be easily serviced. I’ve read recently that many cellphones get replaced when their batteries goes bad after around 18 months of use. I find that to be extremely wasteful, and in the case of most cellphones, completely unnecessary because the batteries are generally easily replaced (unless you have an iPhone) . Of course, the battery packs sometimes have excessive markups on them when purchased from the manufacturer so that probably contributes to it as well.
I think that building batteries into a product in such a way that they cannot be replaced by an end user is unacceptable. Rechargeable batteries are only good for around 500 charge cycles and then they must be replaced. I wouldn’t want to be associated with a product where the batteries are so difficult to replace that the battery life determines the useful life of the product.
The R9190 has two AA NiCad batteries soldered together with some wiring. They are relatively easy to replace once you figure out how to get the case apart.
Both shavers are working great now and I can again enjoy the experience of untethered shaving.
UPDATE 2009-01-25
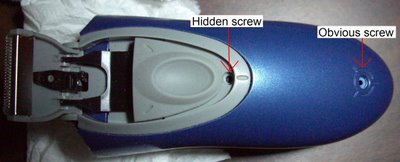
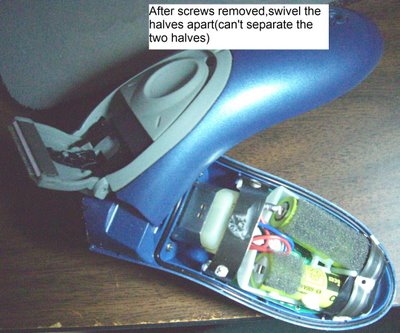
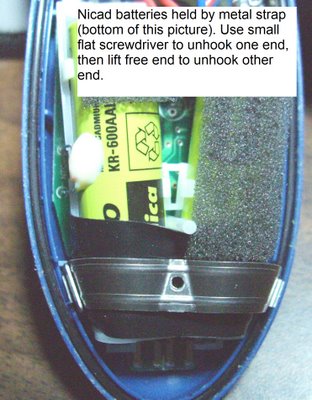
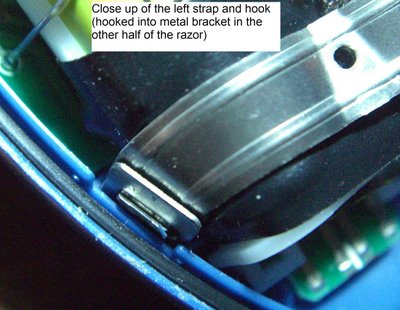
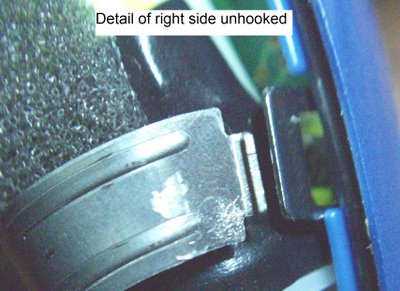
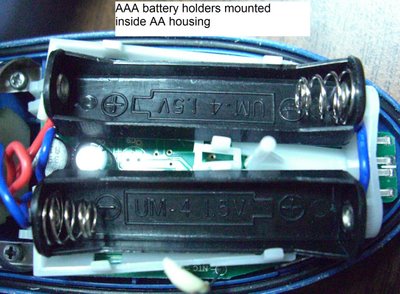
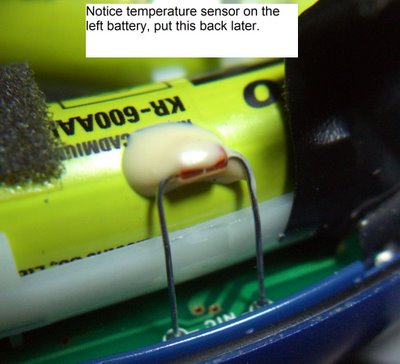
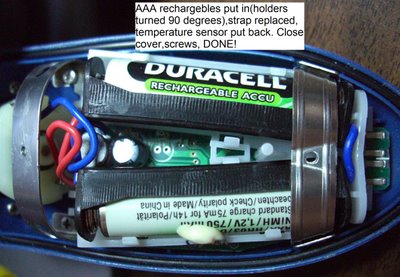
I continue to get a lot of hits on this web page so I can only imagine that many people have encountered the same problem, i.e., a razor that is still working, but with batteries that have gone flat. A very nice gentleman sent me the images below complete with annotations to show how he repaired his Remington Model 8100 razor. He replaced the solder tail AA batteries with holders for AAA batteries. Even though AAA batteries are much smaller, and usually have half the capacity of AA batteries, he found some that had nearly equal capacity to the AA batteries he replaced. The best part of his repair is that the next time they go flat, it will be very easy to replace them because it will require no soldering.
UPDATE 2012-02-26: I continue to have readers send me tips and photos on razors that are a bit different than the ones shown above. In this case John H. was kind enough to put together an 8-step sequence on how to get to the batteries on the Remington M280 M290 style razors:



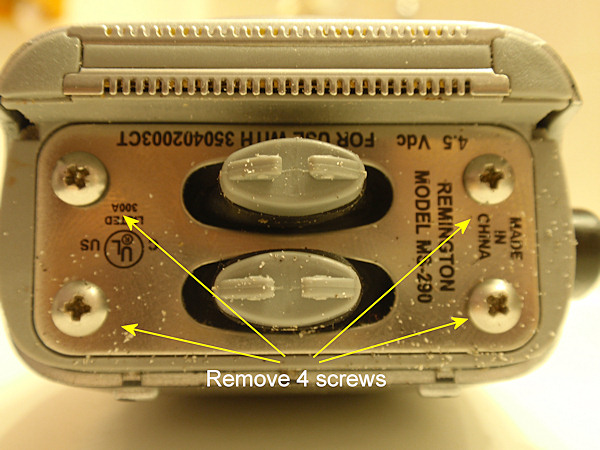
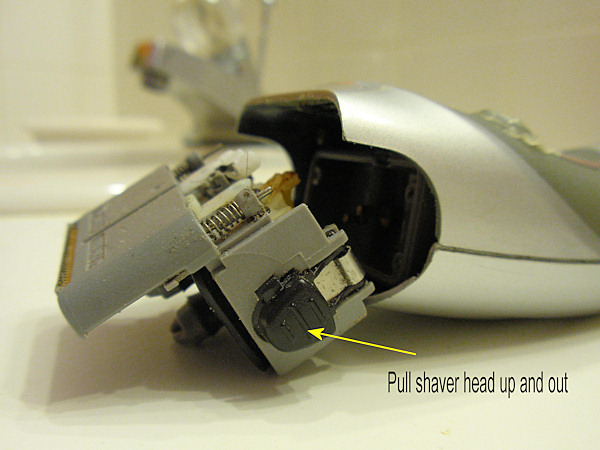
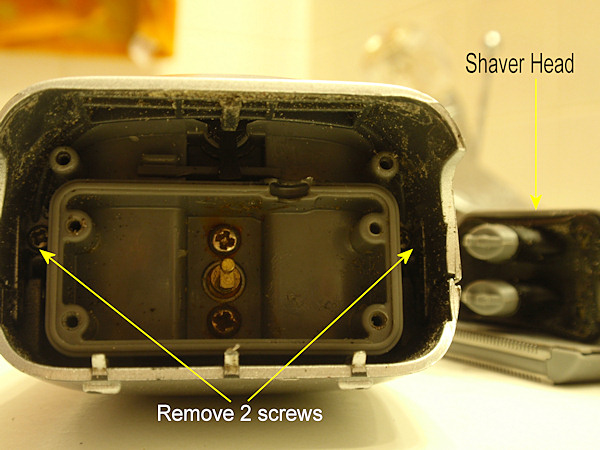
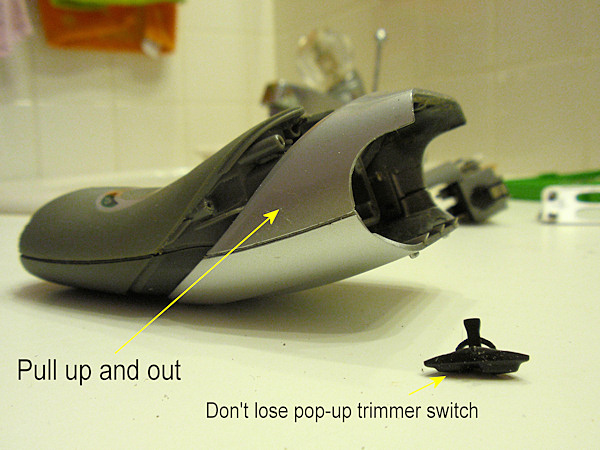
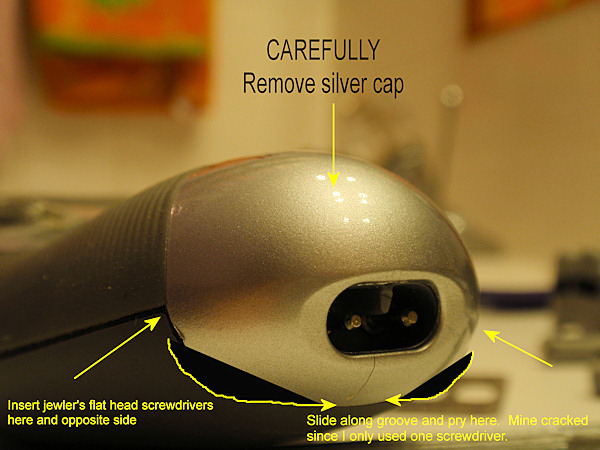
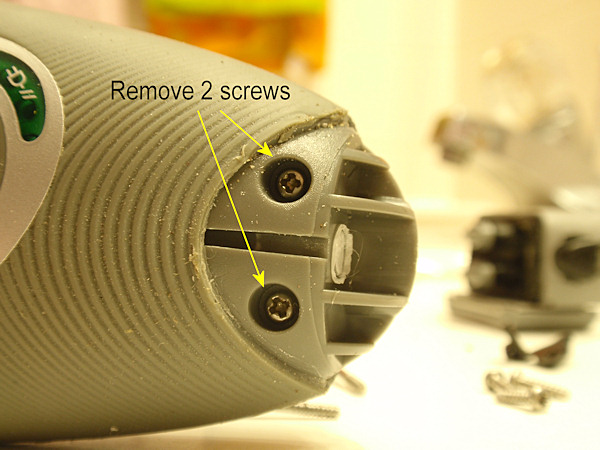
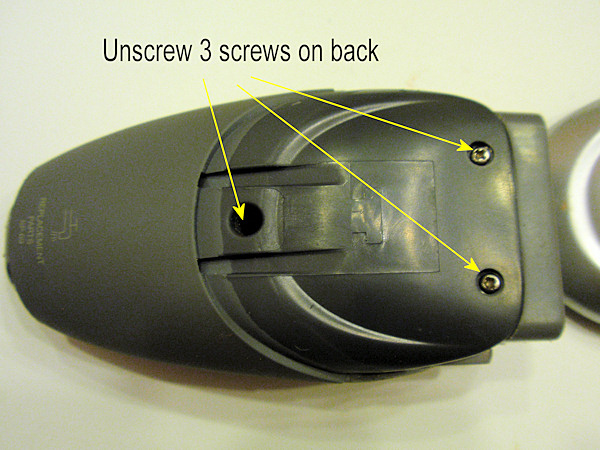
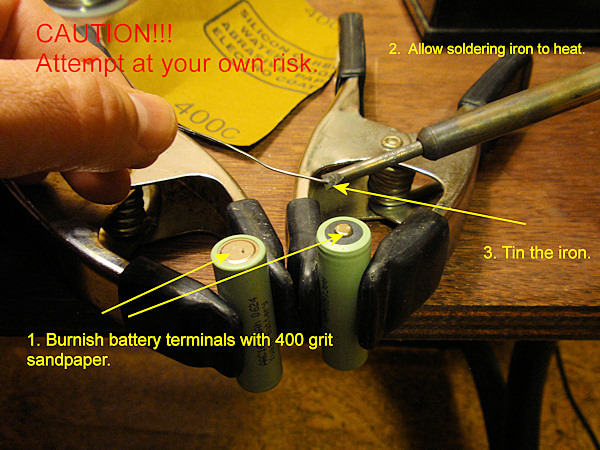
Hi, thanks for the very helpful site.
I’ve replaced my R 9190 batteries (labelled 1.2V Ni-MH, unknown mAh) with 1.2V, 2400mAh, NiMH, solder tab batteries.
Worked OK for a couple of weeks but now only starts if I charge them for at least 10min, start the shaver while connected to the charger, disconnect it and then it only lasts the length of the shave. If I stop it, the red LED flashes and it won’t restart unless I follow the same procedure.
The batteries seem fully charged, 1.34 on the voltmeter, I’ve tried dis/reconnecting them and running the shaver without the head, to no avail.
Any suggestions? I’m aware some charging circuits require batteries of specific capacity. Should I try a lower mAh? Is 1.34V per battery enough?
Any help appreciated.
Hi Peter, It seems like 1.34V per cell would indicate you’ve got good batteries, but perhaps under load one of them is not able to deliver its rated current. I’d try measuring the voltage across each of them when the razor is running. I’m not sure that lowering the capacity would help, since when it comes to capacity, I’ve never seen a situation where more capacity didn’t work better.
Thanks Lee, I appreciate your advice. I’ve replaced both with a new pair of 2400 mAh, I’ll see how they go. I recall reading of some chargers which are designed for batteries upto a specific mAh value and that these chargers struggle to charge batteries of higher mAh. Given however that neither you or others seem to have encountered that problem, your suggestion is more likely. There is a chance the shaver was accidentally switched on in luggage for a while just before the replacement batteries started playing up, maybe that damaged them? Cheers!
Can anyone help with instructions on how to change the battery in a lady’s remington shaver model WDF 6000
Regards
Peter M
How to take off Remington ms3 2000 head assembly
…had a problem with retracting the beard trimmer–needed cleaning.
don’t bother with the two screws holding the metal plate to the head assembly–there are two semi-circular wahers under it that take forever to put back on
don’t bother with the screw under the lable on the back of the body either–doesn’t need to come off just to remove the head assembly
removal of the 4 screws near where the screen assembly clips come throught the bottom of the head assembly is all that is needed for removal of entire head assembly
after disassembly of head from body, the entire head assembly can now be washed under running hot water using dish detergent until the beard trimmer operates correctly