Fake Virus Scanner Scams

Share

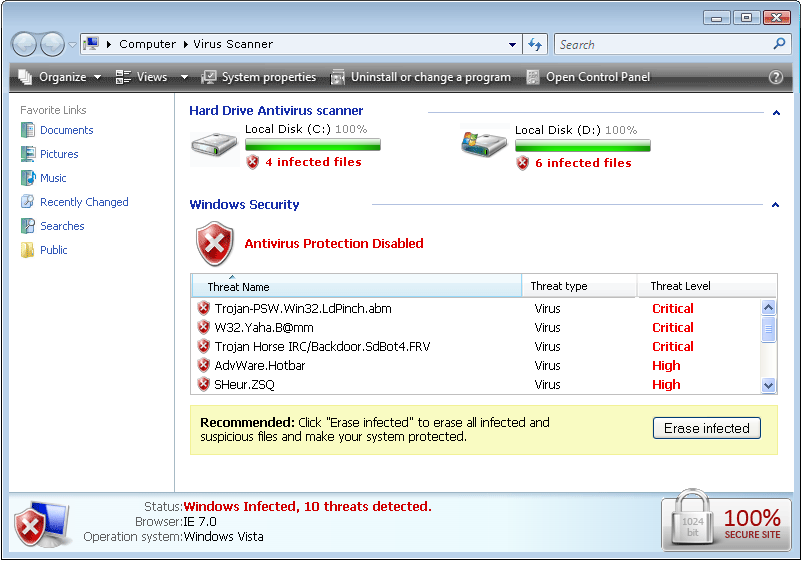
By now you’ve no doubt visited at least one website, usually one that appears in page one of Google’s search results, that does a redirect and all of a sudden, what appears to be a virus scanner is now running on your computer screen. It may look something like the window below.

fake virus scanner

Click on the image for a larger version of it.

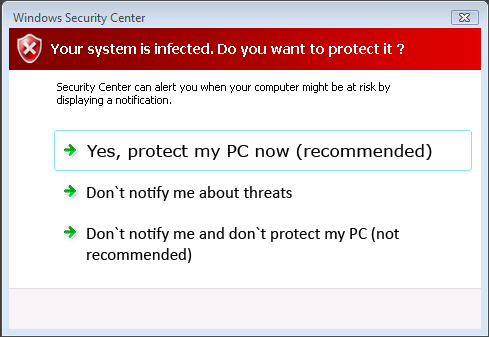
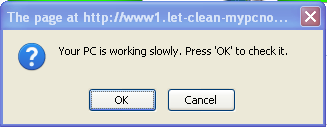
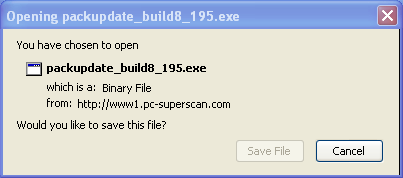
The image on the screen is animated with the green bars filling in and the % complete changing, and shows that it’s scanning your drives for viruses. It finishes in a surprisingly short time. However, it’s just a JavaScript animation, nothing more, and it’s not doing anything with your files because browsers cannot open your computer’s files without your help. Invariably, it will find threats and invite you to download a product to ‘fix’ them. The other messages that pop up may look like the following:

Most of the popups are harmless, but the last one is an attempt to get you to download an executable file that, if you open it, invariably will end up taking you to a site where you’ll have to put in your credit card number to pay for the virus scanner to remove the viruses and to ‘keep you safe’.

Downloading an .exe file won’t do anything by itself, but if you open an ‘.exe’ file, then all bets are off, because it can do anything it wants, including installing a real virus, which would not be a stretch for a company that is trying to steal from you already.

The safest place to click on the pop-up windows are on the red X’s in the upper right hand corner to close them, but sometimes you’ll find that you can’t get out of the web page or browser because they keep popping up. If your browser keeps a ‘memory’ of the sites you were on when it closed (like Firefox does), it feels like you can’t get rid of the offending site. But there is a way to safely extract yourself from the clutches of these evil doers.

You can disable JavaScript temporarily and all windows will close when you close them and the popups will stop. To disable Javascript on Firefox, just click on Tools->Options->Content and uncheck the box next to JavaScript. You can re-enable it after you’ve gotten out of the website. For Internet Explorer, to disable JavaScript, you can select Tools->Internet Options->Security->Custom Level and scroll to the “Active scripting” section of the list (under “Scripting”) Click Disable.

JavaScript by itself cannot harm your computer, but if you give it help, by actually acting on the pop up messages and saying ‘ok’ or ‘yes’ when you’re in this situation, then you can do yourself some harm, and pay the price for what will be, at best, a useless virus scanner. It’s pretty hard to use the Internet these days with JavaScript disabled, because so many sites depend on it to work properly. So trying to disable JavaScript permanently isn’t really an option.

There are a number of real virus scanners out there, and a popular one is AVG. You can download and install it for free, although it may do some unsavory things such as change your default search engine to Yahoo and install yet another toolbar. These things are easily reversed, of course.

So, you might wonder, how does this happen that a website ends up in page one of Google’s search results and yet is a site that is so obviously evil that it’s trying to extort money from you? It’s usually done by cloaking. When Google’s search bots go looking to index websites, these sites give the search bots a different page filled with keywords that look like an exact match for what you’re searching for so they score high enough to reach page one. However, when the website detects a real browser, it will redirect it to another website that tries to convince you that you have a virus and now must buy some protection. Google and other search engines hate cloaking, but they have a hard time detecting it, since a website can tell whether it’s being visited by a search bot vs. a browser.

If you’ve visited a site like this, you should to do a real virus scan, particularly if you allowed it to download and execute the .exe file. As long as you didn’t open the .exe file, you’re probably OK, but for peace of mind, a scan with AVG or similar virus scanner may help your computer feel just a little less slimy after visiting one of those sites.

Bear Chews up Plane, Duct Tape to the Rescue

Share

I am amazed at the resourcefulness of Alaskans. During a private “fly-in” fishing excursion in the Alaskan wilderness, the chartered pilot and fishermen left a cooler and bait in the plane. And a bear smelled it. This is what he did to the plane, a Piper Super Cub.

The pilot used his radio and had another pilot bring him 2 new tires, 3 cases of duct tape, and a supply of sheet plastic. He patched the plane together, and FLEW IT HOME!

Click on any image below for a higher resolution version.

bear damaged plane

How would you like to come back from a day of fishing to find this?

bear damaged plane

The bear destroyed a plane… all for some bait fish…

And a few tasty tires…

duct tape repair on plane

Looking good!

plane duct tape repair job
Good enough to fly…

I like the way he ‘kept it legal’ with the tail number written by hand on the duct tape. You have to click on the image to get a bigger view and squint to see the tail number written over the duct tape, N9368D.

Adaptive Interfaces

Putting Tire Sealant in Presta Valve Tubes

Share

I got a new bike earlier this summer (a Kona Dew Deluxe) and it’s a sort of cross between a mountain bike and a road bike. It uses the narrow 700 cm road tires and so I’m learning to deal with Presta valves whenever I need to inflate the tires. That requires putting an adapter on the valve stem since my air compressor is set up for much more common Schrader valves.
kona-dew-deluxe
One of the annoyances of bicycling on the Front Range of Colorado is the abundance of thorns called ‘goat heads‘. They will easily puncture bicycle tires. I learned this many years ago when I purchased my first bike in Colorado only to get two flats tires on the same day I took it for its first spin. When I returned to the bike shop, they asked if I had put TR tubes in it yet. TR tubes? “What are those and why didn’t you let me know about this when I bought the bike?” I was new to Colorado and never heard of TR tubes. “TR” stands for thorn resistant and their outside wall is about 4 times thicker than that of standard tubes and so the goat heads generally cannot penetrate in far into the tube wall enough to puncture it. After installing these tubes, I didn’t have any more problems with flat tires from the goat heads on my mountain bike.


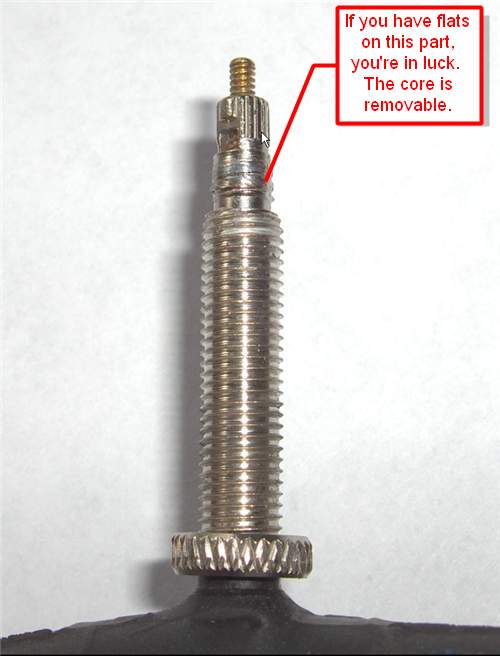
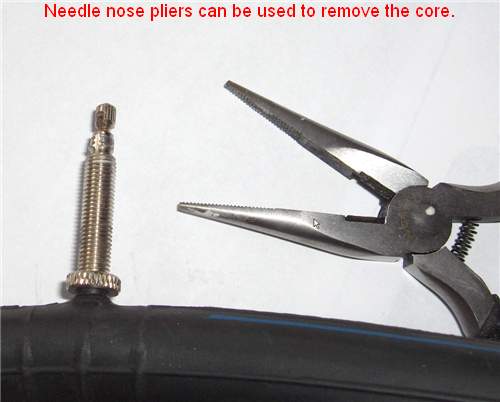
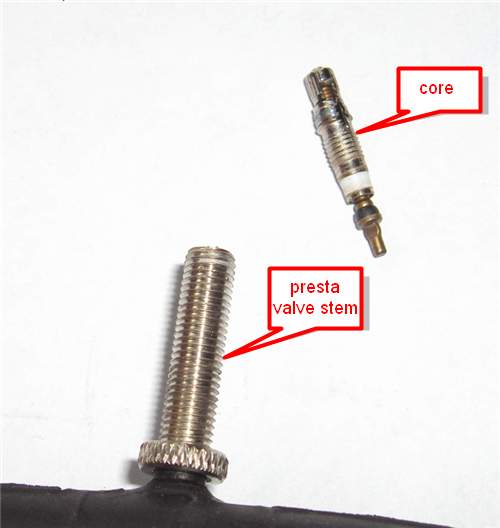
However, with my new bike, despite putting TR tubes in it before leaving the bike shop, I’ve had several flats from goat heads. I guess it’s because the rubber on both the tire and the tube is thinner to begin with than standard 26″ mountain bike tires. So I needed another plan. I see a lot of Slime tube sealant for sale these days in bike shops, and I was wondering if there would be a way to get it into tubes that had these newfangled Presta valves since the cores didn’t appear to be removable. I looked on the Internet and found several websites that talked about a method of using cutters to clip off the last few threads on the part that holds on the nut you need to loosen to put air in Presta valves. This causes the threaded part to fall into the tube which allows enough room to put the Slime in the tire. Then you have to push the threaded part back up into the stem and secure it with the nut, which now has no locking thread to keep you from unscrewing it all the way. I was hoping that I would not have to do that. I found that I was in luck because my tubes had Presta valves that allowed me to remove their cores. If you look at the part of the valve that has the threads to hold the valve cap on and it has flats on it, then that means the core can be unscrewed.

presta-valve-1

This Presta valve above has flats on the threaded part that holds on the cap which means the core can be unscrewed from the valve stem.

presta-valve-2

presta-valve-3

In my case, I already had some Slime but my local bike shop guy, Mark at International Bike in Greeley, is a strong proponent of True Goo. He believes that this product is easier than Slime to put in the tire due to its lower viscosity and that it seals better too.

If you search on the Internet, you’ll see a lot of people telling you these tube sealants don’t work. I think the reason for this is that it’s still possible to get a flat even with tube sealant, especially if the hole is so big that the sealant comes out so fast it can’t solidify. Also, people are much more likely to post a rant about a product that let them down rather than to take the time to post a positive review. In addition, when tire sealant works, you don’t really have hard evidence to let you know that you would have gotten a flat if you didn’t have the sealant in the tube. So it’s hard to measure tube sealant’s effectiveness.

In my case, I had the perfect experiment. My rear tire’s tube was losing nearly all its air every 2 days. It meant that each time I wanted to go for a ride, I needed to put air in the tire. I had debated on whether to patch or replace the tube, but then I realized that it would be a great experiment to see for myself whether tire sealant actually works, especially on slow leaks, which are the kind you generally get from the tiny holes that goat heads put in the tubes.

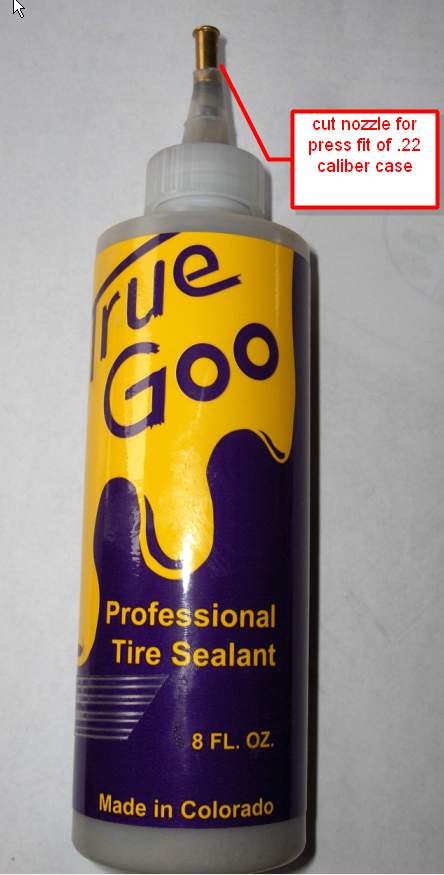
In order to put the sealant in the tire, my bicycle guy gave me some good advice. The rubber transfer tube that comes with these sealants is sized to be a press-fit on Shrader valves, which is much too large in diameter to seal on Presta valve stems. However, if you gradually cut the top of the cone-shaped nozzle until it is a press-fit for a .22 caliber cartridge, it will also be a press fit on a Presta valve which is about .235″ in diameter. You can also use the .22 bullet as a cap because the red cap that is included with it will no longer fit after you cut that much of the tip off the nozzle. You can use a spent .22 caliber casing or something else that is similar in diameter if you’re worried about using live ammunition to seal the bottle. Here’s a picture of what it looks like:

True Goo tire sealant

True Goo tire sealant

If your Presta valve has a removable core, you can even put the sealant in when the tire is on the bike. Just rotate the valve to the top, insert the nozzle on the valve stem, and rotate it back around to the bottom. Squeeze in about 3 ounces of fluid, rotate back to the top, remove the bottle. Then replace the valve core and fill it with air.

I found that my tire that leaked down every 2 days consistently has now held its pressure for several weeks, which leads me to believe that this stuff actually works as advertised.

How to make mailing labels with Excel and Word

Share

I’ve done mailing labels over the years when I was the local chapter EAA newsletter editor and then a few times for Christmas cards, but each time I do them now, it seems that I can’t remember the steps it takes to repeat the process and as a result, it feels like I have to learn it all over again. So today I carefully went through the procedure because I’m helping out with my high school reunion and we will need to print out mailing labels several times in the next few months. I figured other people might want to know how to do it, so I will give the step-by-step method here in the blog.

First of all, you will need to put your mailing database in an Excel spreadsheet. Even though you’ll use the MailMerge function of Word, a spreadsheet is much easier for manipulating lists of data compared with trying to work with tables in Word. You should title the columns with intuitive names such as, LastName, FirstName, Address1, City, State, Zip code because if you do, MailMerge will usually correctly guess the order to arrange the data when it comes time to put them into a mailing label format.

I like using type 5160 Avery adhesive labels which are arranged in 8.5″ x 11″ sheets with individual labels 1″ x 2.625″ spaced 3 across and 11 down for a total of 33 labels per page.

[Note: When I first wrote these instructions, I was using Office 2003. Now that I have Office 2007, I can see that some of the menus have been changed. I’ll add some extra instructions below for those with Office 2007.]

Here are the steps for producing labels using the Mail Merge program in Microsoft Word:

Launch Word and use File->New to create a Blank Document

Tools->Letters and Mailings->Mail Merge Wizard

[Office 2007: Mailings -> Start Mail Merge -> Step-by-step Mail Merge Wizard ]

You’ll see Step 1 of 6:

Choose the option ‘Labels’ then select ‘Next’ at the bottom of the menu.

Step 2: Make sure ‘Change document layout’ radio button is selected and then and select ‘Label options…’ below it.

This will take you to a Label Options menu that allows you to select a label type. I use ‘Avery Standard’ and type ‘5160 Address’. Then select OK. Office 2007 asks you if it’s OK to overwrite your document at this point. Select OK.

In Word 2003, a grid should appear in your document that shows labels borders spaced in 3 columns, 11 rows per sheet. This grid doesn’t appear in Word 2007.

Step 3: Now select ‘Next: Select recipients’

Make sure the option to ‘Select/Use an Existing list’ is selected and the select ‘Browse’ and find the .xls file on your computer with your database and then open it. Select the spreadsheet page you wish to use. If it has just one page, you will see $Sheet1 and you should select it. In Word 2003 you may select ‘entire spreadsheet’ if you have only one sheet. You will then see a list of names from the spreadsheet. Select OK. You may have to select OK again. A list of <> entries will appear in the document.

Step 4: Now select ‘Next: Arrange your labels’

Select ‘Address Block’. Look at the preview field to see if the example label has all the information you want. Because of the layout of the heading row spreadsheet, it should be correct. If it’s not, you can fix it by selecting the ‘Match fields’ option and editing them. Now select OK. You should see <> in the first label and <> in all the other labels. Select ‘Update all labels’. This will cause the text <> to be added to all the labels that previously had just <> in them. So the first field will have <> and all the others will have <><>.

Note: If you wish to have more control over your labels, instead of selecting ‘address block’, you can select ‘More options’ and this will allow you to apply the exact amount of spacing, carriage returns, etc., around each field. I’ve found this helpful if you have international addresses mixed in.

Step 5: Now select ‘Next: Preview your labels’

Now you will see a sample page of the labels.

At this point, you can select ‘Print…’ which will walk you through the steps of printing out the labels on a local printer, or you can select ‘Edit individual labels…’ If you select that, it will create a Word document file that you can edit or store away for future use or print from another computer. I usually use that option.

I should mention that there was an issue with the zip codes that started with ‘0’ (zero). You should format that field in the spreadsheet as a ‘special’ zip code field, which is an option in the format command of Excel. Then during the import to MailMerge, I had to use these steps.

Preparing DDE settings in Microsoft Word:
If you perform a mail merge in Office 2003 and use Excel as the data source, some of the numeric data may not retain its formatting when merged. To resolve this:
1. Open Word
2. On the Tools menu, click Options, and then click the General tab.
3. Click to select Confirm conversion at open check box, and click OK.
4. Continue creating the mail merge as explained above
5. Open Data Source.
6. In the Confirm Data Source dialog box, click MS Excel Worksheets via DDE (*.xls), then click OK.

You may have to answer a few questions when you import the .xls file but it will fix any issues with the zip code field, especially with those starting with ‘0’ (zero).

Another trick to making labels is printing a single sheet of labels out on plain paper first to make sure the alignment is OK. You can hold the sheet of labels up to the light with the printed paper labels behind it and insure that the text will all end up inside the sticky label borders. You don’t want to be making mistakes on the label stock because it’s much more expensive than plain paper.