The BMW 3-series cars manufactured from 1991-1999 are getting to the age where the electric door actuators are wearing out and there’s nothing more frustrating than a door lock that won’t respond to the key fob. My wife’s BMW 328i passenger door had this problem a few years ago and I recalled replacing one of the actuators with instructions I found on the Internet. However, when her driver’s side door began having the same issue, the instructions that I found on the Internet seemed to be lacking in the important details, and it had been long enough that I had to ‘re-learn’ the tricks I had forgotten since I last tackled this project. So I decided to write up this article to help anyone who is contemplating this as a DIY project.
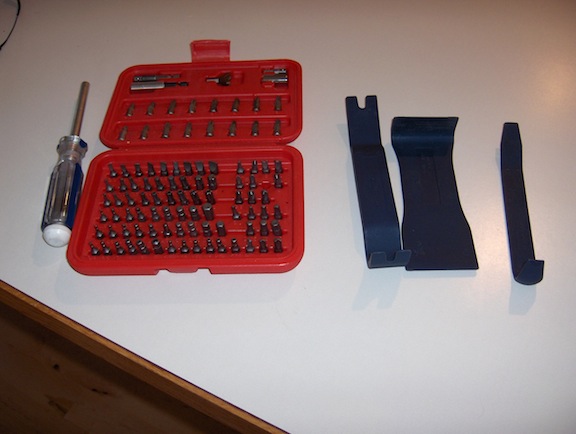
You will need the following tools: Torx driver with T-20 and T-27 bits, non marring pry bars and (possibly) a set of vice grips.
BMW door actuators are available from several on-line retailers. The best price I’ve found for OEM actuators was at BMW Parts Web. Just search on p/n 67-11-1-387-726 (front actuator) or p/n 67-11-8-353-011 (rear actuator) for E36 models. Just be sure to get the correct one since the front doors use a different connector that has 6 pins whereas the rear actuators have only 3 pins. The ones I got were aftermarket units that I can’t find anymore.
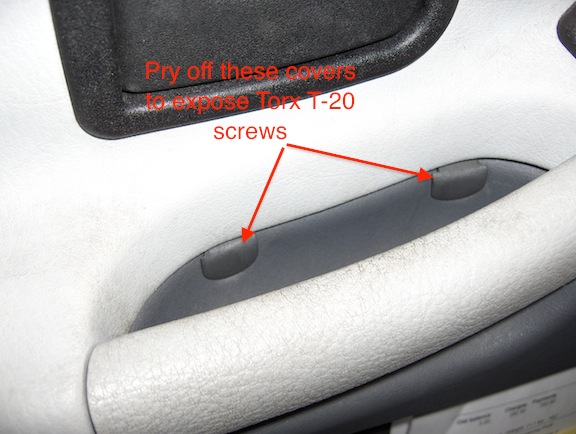
The door panels on the E36 are not hard to remove, you just need to pop off two screw covers behind the inside handle, and remove the screws they covered with T20 torx driver. Each screw was a different length, which I didn’t notice until I was going to re-install them. The longer screw goes in the hole toward the front of the handle.
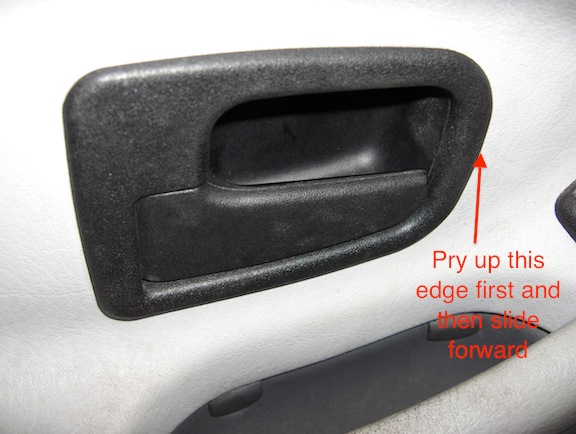
Then you have to remove the dish behind the door pull and this is where I ran into trouble. Evidently, a lot of people break this part, assuming that it comes straight out. The advice is to push it forward. However, until you pry up the front of it, there’s no way it will move forward, so that is the step everyone seemed to leave off. First pry up the front, and THEN push forward.
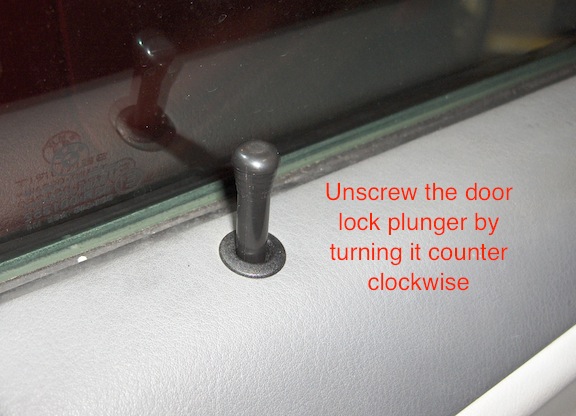
Next you remove the door lock plunger by unscrewing it (counter clockwise), and you may need some pliers to gently grab it and get it started because it’s hard to grasp by hand and apply any torque.
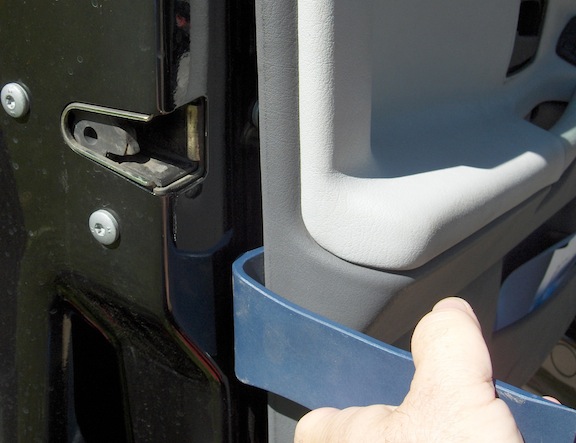
The next step is to pry off the door panel using a non-marring pry tool and gently pop out all of the plastic fasteners as you work your way around the door. You’ll need to rotate it up to get it off of the door lock plunger push rod.
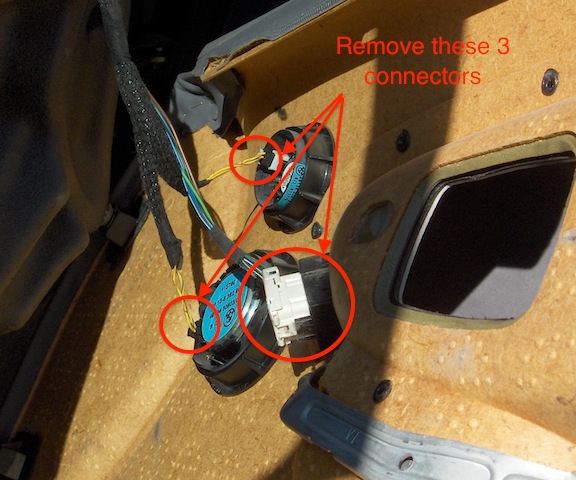
When the door panel comes off, it will still be connected by the wires connected to two speakers and to the buttons that are used to adjust the mirror (if it’s the driver side door). The connectors are held in with friction, so you don’t have to find any hidden latches to free them, just pull them out. They are keyed so you can’t install them backwards.
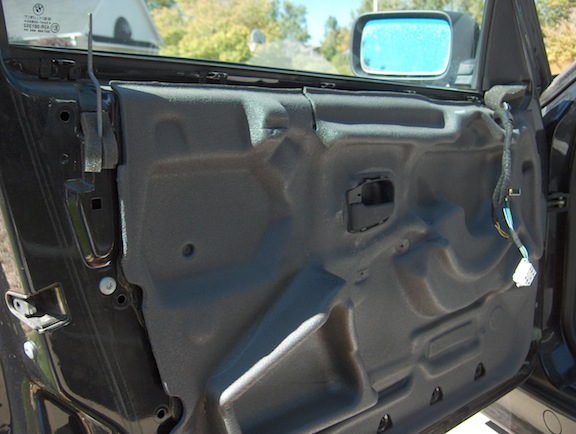
After the door panel is free, you’ll need to peel back a foam sound insulator that is held in place by some very sticky black adhesive. It’s best to peel it half way off and then use some duct tape to hold it out of the way. Be careful around the black adhesive, since it will get over all over you if you touch it.
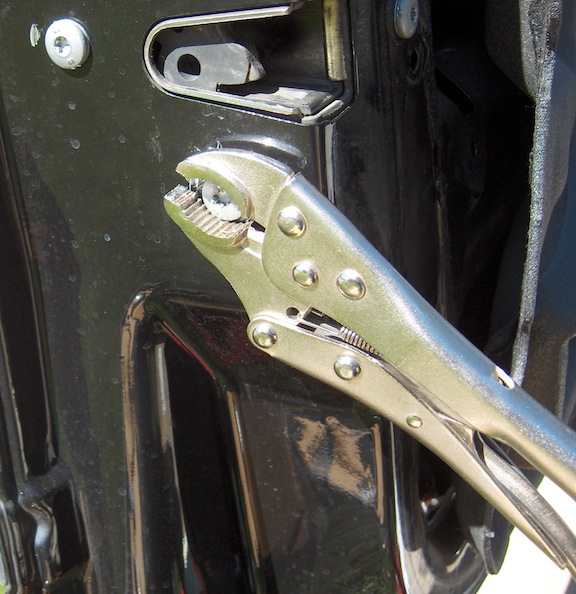
Next you need to loosen 3 screws that hold in the door lock mechanism with a T27 torx driver. However, these screws have thread locking compound on them and I soon realized that I was either going to destroy the Torx recess or break the driver bit unless I loosened them with vice grips first. Fortunately this is easy to do. Use adhesive tape over the adjacent paint around the screw heads if you want to avoid scratching it with the vice grips.
There is a rod that goes to the door opening latch and the latch can be removed with a T20 driver. I don’t have a picture of this, but it’s pretty self-evident how to take it off and disconnect the rod. Mine had a Tinnerman type nut that fell off the back, so be careful to catch the nut as you loosen the screw. Removing the latch allows you to move the locking mechanism with a bit more freedom.
Once you’ve done this, the mechanism can be wiggled about inside, but there’s not enough room to get it out of the door. Cut off any tie wraps on the wires going to the actuator to gain a bit more wiggle room. This is where the confusion ensued. All you really need to get out is the electric actuator, but it wasn’t obvious how it was held on and whether I’d be able to install the new one working in the blind, so to speak. I even got desperate enough that I removed what I thought was a simple stiffening bracket that was in the way that turned out to be the curved window track. In retrospect, it didn’t give me much more freedom to move the lock mechanism about and I worried that it would be hard to reinstall, since its upper end mated with another part that was up inside a blind recess. If I were to do it again, I’d try to avoid removing the window track.
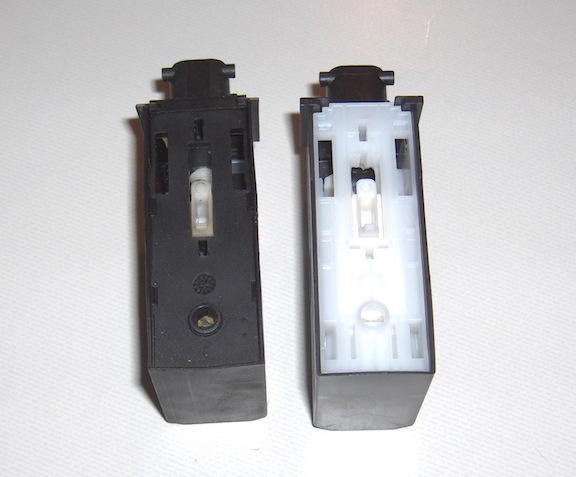
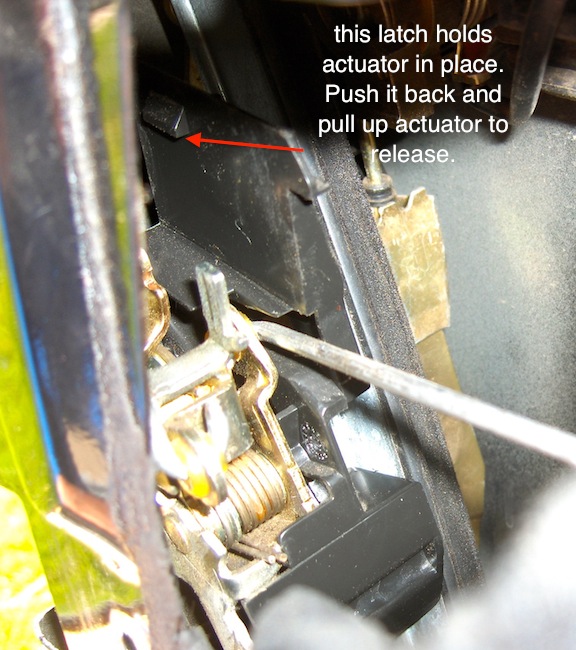
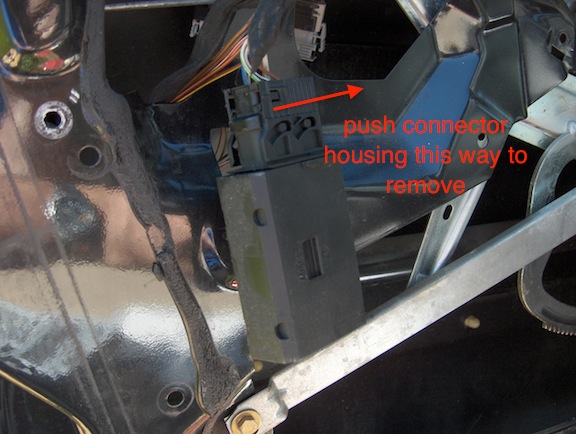
The electric actuator is held in place by a cantilevered plastic latch that grabs a recessed depression on its housing. You need to feel around for this latch, pull it back and lift the actuator up and away from the door latch mechanism. Once you do this, you can bring the electric actuator out into the open so you can disconnect the connector.
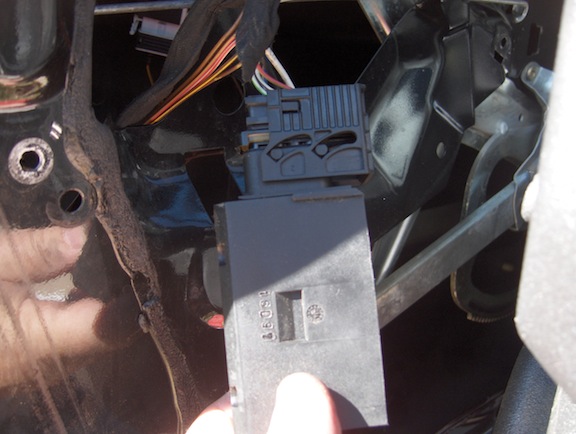
The connector is one of those unique to BMW where you push a mechanism down and it forces the connector outward over some pins that follow a curved track in a cam mechanism.
The re-installation of the new actuator on to the cable is just the reverse. You have to push the latch mechanism all the way down, and then align the cam pins in their slots in the connector and then pull the mechanism up to draw the connector into its recess.
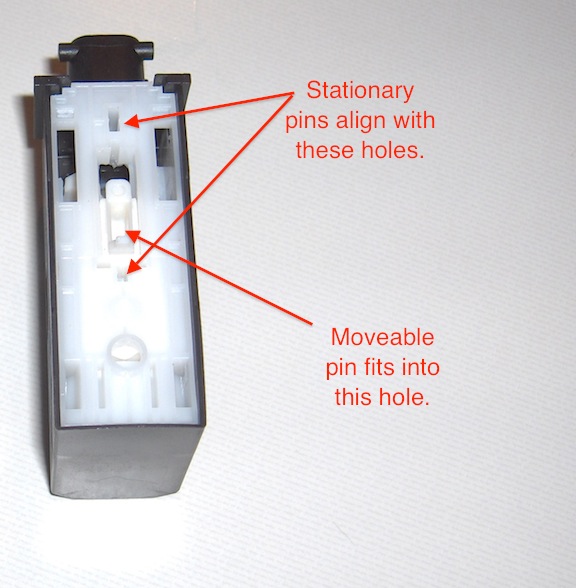
Once you’ve got the new actuator in place on the cable, the challenge is to get it back on the door latch mechanism by a sense of feel. There are 4 flat metal pins that need to mate up with holes in the actuator. Three of these are in line with each other and they have specific holes they need to mate with on the actuator. The two end ones go up into rectangular alignment holes and the middle one goes into the part of the actuator that moves back and forth. Make sure the middle hole is aligned with actuator pin by either pushing it forward or backward. When installed on the cable, this action will either open or close the door locks as you do it if you’re working on one of the front doors since they control the behavior of all other locks in the system.
In order to get the door lock actuator to align laterally, you will have to apply some sideways force since the cantilevered plastic latch will be pushing against it and you need to spring it outward a bit. Once the metal stampings are aligned in their respective holes, you can push the actuator down on the latch mechanism until the latch snaps in place. This was the hardest part of the whole project. I assumed I was going to be able to get the door latch mechanism out in the open or at least in a place that was easier to see, but it ended up being more of an exercise in working in a confined space with very limited visibility and access.
After I got everything back in place, there was a panicky moment where I had somehow gotten the door latch mechanism into a locked state even though the door was still open. Then door would not close. There was just a loud thud as the hook and latch banged into each other when I attempted to close the door. I was thinking I might have to re-open everything again, but I started playing with the lock, the key, and manually trying to open the lock by hand and I eventually got it all back in the proper state so the door would close normally.
It was with a great sigh of relief when everything was back together. These parts generally fail over time, and my wife had been experiencing problems for months where it was intermittent. Finally, the cold weather made it happen nearly 100% of the time, so she was very grateful to have a working set of locks again.
The BMW electric door actuators are available on-line from suppliers like Bavarian Auto for around $90 each + shipping but the best price was from BMW Parts Web and that was true of most BMW parts I’ve checked on.





Thanks for this DIY. I used it to help me replace the right front door actuator in my 1997 E36 M3.
–Costco Shopper
My passenger door actuator failed on my 316i compact. It failed in the locked state and therefore I could not open the door. My fix was removing the passenger seat. I removed the three screws that behind the abs badge, door handle and the blank where the side mirror adjustor would be. I think pulled from the bottom to disengage the panel from the door. Fortunately the plastic clips near the glove box came unglued and I was able to remove the panel without damage. Stuck my hand in the door and played around with the linkage until the door unlocked. Removed the old actuator and plugged in the new one to confirm the old one was dead and new one is functioning. I am having issues getting the new one back in, but I will try again later. My door opens now, which partially fixes my problem.
Alert! Warning! The t27 bit listed should actually be a t30. Using a t27 WILL strip out those bolts!